Python接口自动化浅析logging封装及实战操作
在上一篇Python接口自动化测试系列文章:Python接口自动化浅析logging日志原理及模块操作流程,主要介绍日志相关概念及logging日志模块的操作流程。
而在此之前介绍过yaml封装,数据驱动、配置文件、日志文件等独立的功能,我们将这些串联起来,形成一个完整的接口测试流程。
以下主要介绍将logging常用配置放入yaml配置文件、logging日志封装及结合登录用例讲解日志如何在接口测试中运用。
一、yaml配置文件
将日志中的常用配置,比如日志器名称、日志器等级及格式化放在配置文件中,在配置文件config.yaml中添加:
logger:
  name: ITester
  level: DEBUG
  format: '%(filename)s-%(lineno)d-%(asctime)s-%(levelname)s-%(message)s'
封装logging类,读取yaml中的日志配置。
二、读取yaml
之前读写yaml配置文件的类已经封装好,愉快的拿来用即可,读取yaml配置文件中的日志配置。
yaml_handler.py
import yaml
class YamlHandler:
    def __init__(self, file):
        self.file = file
    def read_yaml(self, encoding='utf-8'):
        """读取yaml数据"""
        with open(self.file, encoding=encoding) as f:
            return yaml.load(f.read(), Loader=yaml.FullLoader)
    def write_yaml(self, data, encoding='utf-8'):
        """向yaml文件写入数据"""
        with open(self.file, encoding=encoding, mode='w') as f:
            return yaml.dump(data, stream=f, allow_unicode=True)
yaml_data = YamlHandler('../config/config.yaml').read_yaml()
三、封装logging类
在common目录下新建文件logger_handler.py,用于存放封装的logging类。
封装思路:
- 首先分析一下,logging中哪些数据可以作为参数?比如日志器名称、日志等级、日志文件路径、输出格式,可以将这些放到__init__方法里,作为参数。
- 其次,要判断日志文件是否存在,存在就将日志输出到日志文件中。
- 最后,logging模块已经封装好了Logger类,可以直接继承,减少代码量。
这里截取logging模块中Logger类的部分源码。
class Logger(Filterer):
    """
    Instances of the Logger class represent a single logging channel. A
    "logging channel" indicates an area of an application. Exactly how an
    "area" is defined is up to the application developer. Since an
    application can have any number of areas, logging channels are identified
    by a unique string. Application areas can be nested (e.g. an area
    of "input processing" might include sub-areas "read CSV files", "read
    XLS files" and "read Gnumeric files"). To cater for this natural nesting,
    channel names are organized into a namespace hierarchy where levels are
    separated by periods, much like the Java or Python package namespace. So
    in the instance given above, channel names might be "input" for the upper
    level, and "input.csv", "input.xls" and "input.gnu" for the sub-levels.
    There is no arbitrary limit to the depth of nesting.
    """
    def __init__(self, name, level=NOTSET):
        """
        Initialize the logger with a name and an optional level.
        """
        Filterer.__init__(self)
        self.name = name
        self.level = _checkLevel(level)
        self.parent = None
        self.propagate = True
        self.handlers = []
        self.disabled = False
    def setLevel(self, level):
        """
        Set the logging level of this logger.  level must be an int or a str.
        """
        self.level = _checkLevel(level)
接下来,我们开始封装logging类。
logger_handler.py
import logging
from common.yaml_handler import yaml_data
class LoggerHandler(logging.Logger):
    # 继承Logger类
    def __init__(self,
                 name='root',
                 level='DEBUG',
                 file=None,
                 format=None
                 ):
        # 设置收集器
        super().__init__(name)
        # 设置收集器级别
        self.setLevel(level)
        # 设置日志格式
        fmt = logging.Formatter(format)
        # 如果存在文件,就设置文件处理器,日志输出到文件
        if file:
            file_handler = logging.FileHandler(file,encoding='utf-8')
            file_handler.setLevel(level)
            file_handler.setFormatter(fmt)
            self.addHandler(file_handler)
        # 设置StreamHandler,输出日志到控制台
        stream_handler = logging.StreamHandler()
        stream_handler.setLevel(level)
        stream_handler.setFormatter(fmt)
        self.addHandler(stream_handler)
# 从yaml配置文件中读取logging相关配置
logger = LoggerHandler(name=yaml_data['logger']['name'],
                       level=yaml_data['logger']['level'],
                       file='../log/log.txt',
                       format=yaml_data['logger']['format'])
四、logging实战
在登录用例中运用日志模块,到底在登录代码的哪里使用日志?
- 将读取的用例数据写入日志、用来检查当前的用例数据是否正确;
- 将用例运行的结果写入日志,用来检查用例运行结果是否与预期一致;
- 将断言失败的错误信息写入日志。
接下来直接上代码,在登录用例中添加日志。
test_login.py
import unittest
from common.requests_handler import RequestsHandler
from common.excel_handler import ExcelHandler
import ddt
import json
from common.logger_handler import logger
@ddt.ddt
class TestLogin(unittest.TestCase):
    # 读取excel中的数据
    excel = ExcelHandler('../data/cases.xlsx')
    case_data = excel.read_excel('login')
    print(case_data)
    def setUp(self):
        # 请求类实例化
        self.req = RequestsHandler()
    def tearDown(self):
        # 关闭session管理器
        self.req.close_session()
    @ddt.data(*case_data)
    def test_login_success(self,items):
        logger.info('*'*88)
        logger.info('当前是第{}条用例:{}'.format(items['case_id'],items['case_title']))
        logger.info('当前用例的测试数据:{}'.format(items))
        # 请求接口
        res = self.req.visit(method=items['method'],url=items['url'],json=json.loads(items['payload']),
                             headers=json.loads(items['headers']))
        try:
            # 断言:预期结果与实际结果对比
            self.assertEqual(res['code'], items['expected_result'])
            logger.info(res)
            result = 'Pass'
        except AssertionError as e:
            logger.error('用例执行失败:{}'.format(e))
            result = 'Fail'
            raise e
        finally:
            # 将响应的状态码,写到excel的第9列,即写入返回的状态码
            TestLogin.excel.write_excel("../data/cases.xlsx", 'login', items['case_id'] + 1, 9, res['code'])
            # 如果断言成功,则在第10行(测试结果)写入Pass,否则,写入Fail
            TestLogin.excel.write_excel("../data/cases.xlsx", 'login', items['case_id'] + 1, 10, result)
if __name__ == '__main__':
    unittest.main()
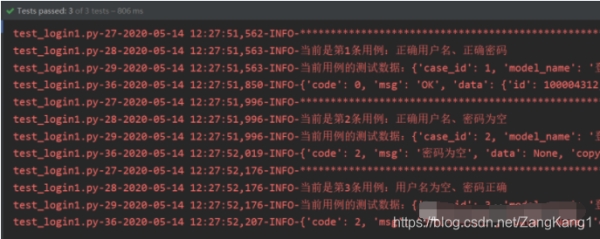
控制台日志输出部分截图:

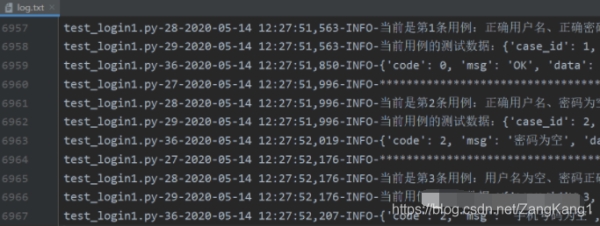
日志文件输出部分截图:

以上就是Python接口自动化浅析logging封装及实战操作的详细内容,更多关于Python接口自动化logging封装的资料请关注hwidc其它相关文章!
【转自:美国服务器】