OpenLayers实现点要素图层的聚合显示的方法
目录
- 1、前言
- 2、点要素图层的聚合
- 3、聚合特殊处理一
- 4、聚合特殊处理二
- 5.、结语
1、前言
在很多情况下,点要素图层中的要素数量可能会成百上千,这时候如果不做任何处理直接加载到地图上不仅会使用户视觉体验下降,而且也会造成地图界面的卡顿。下面这段代码创建了1000个随机点进行显示:
<!DOCTYPE html>
<html>
<head>
    <meta http-equiv="Content-Type" content="text/html; charset=utf-8" />
    <meta charset="utf-8" />
    <title>OpenLayers</title>
    <style>
        html, body, #map {
            width: 100%;
            height: 100%;
            margin: 0;
            padding: 0;
        }
    </style>
    <link href="libs/ol/ol.css" rel="stylesheet" />
    <script src="libs/ol/ol.js"></script>
</head>
<body>
    <div id="map"></div>

    <script>
        // 随机创建1000个要素
        var source = new ol.source.Vector();
        for (var i = 1; i <= 200; i++) {
            var coordinates = [120.00 + Math.random(), 30.00 + Math.random()];
            var feature = new ol.Feature(new ol.geom.Point(coordinates));
            source.addFeature(feature);
        }
        for (var i = 1; i <= 200; i++) {
            var coordinates = [120.01 + Math.random(), 30.01 + Math.random()];
            var feature = new ol.Feature(new ol.geom.Point(coordinates));
            source.addFeature(feature);
        }
        for (var i = 1; i <= 200; i++) {
            var coordinates = [120.02 + Math.random(), 30.02 + Math.random()];
            var feature = new ol.Feature(new ol.geom.Point(coordinates));
            source.addFeature(feature);
        }
        for (var i = 1; i <= 200; i++) {
            var coordinates = [120.03 + Math.random(), 30.03 + Math.random()];
            var feature = new ol.Feature(new ol.geom.Point(coordinates));
            source.addFeature(feature);
        }
        for (var i = 1; i <= 200; i++) {
            var coordinates = [120.04 + Math.random(), 30.04 + Math.random()];
            var feature = new ol.Feature(new ol.geom.Point(coordinates));
            source.addFeature(feature);
        }

        // 创建图层
        var layer = new ol.layer.Vector({
            source: source,
            style: function (feature, resolution) {
                var style = new ol.style.Style({
                    image: new ol.style.Icon({
                        src: 'img/location.png'
                    })
                })
                return style;
            }
        });

        // 创建地图
        var map = new ol.Map({
            target: 'map',
            layers: [
                new ol.layer.Tile({
                    source: new ol.source.OSM()
                }),
                layer
            ],
            view: new ol.View({
                projection: 'EPSG:4326',
                center: [120, 30],
                zoom: 10,
                minZoom: 5,
                maxZoom: 14
            })
        });
    </script>
</body>
</html>
运行结果如下图所示:
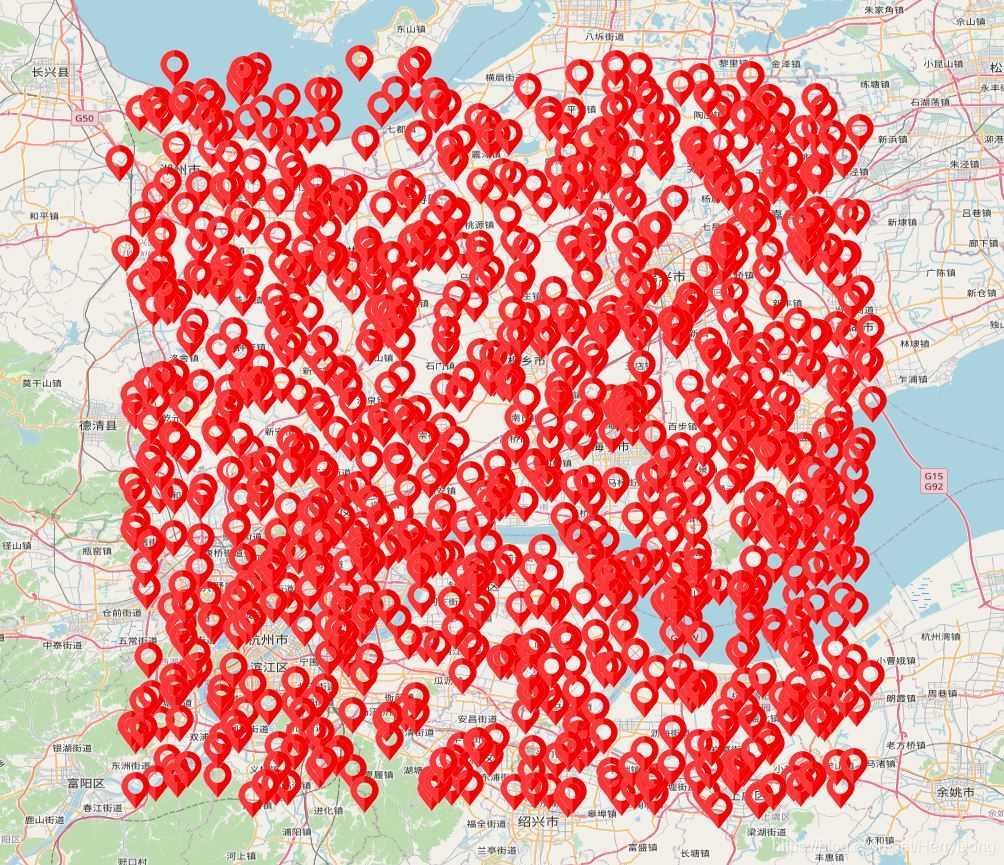
这么多点挤在一起,是不是感觉很恶心?一般来说,如果一个点要素图层中的点数量很多,我们就会采取图层聚合的方式对其进行处理。但需要注意:图层聚合只对点要素图层有效,对线和面图层无效。
2、点要素图层的聚合
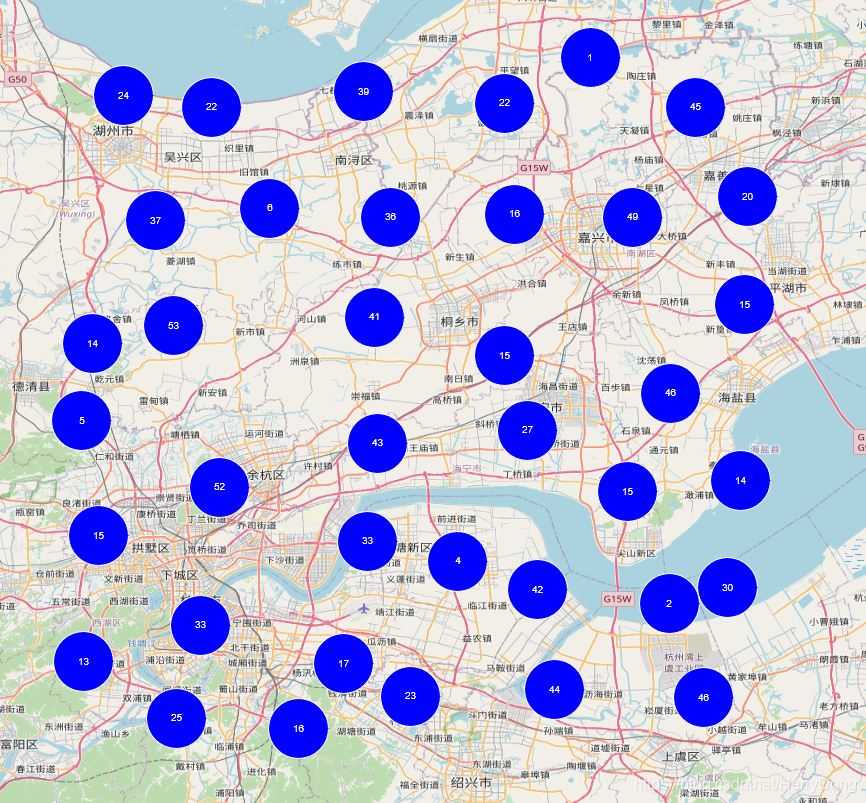
在openlayers中,图层聚合的一般步骤如下:
- 创建要素
- 创建数据源添加要素
- 创建聚合数据源,设置聚合的距离
- 创建图层,将数据源设置为聚合数据源
- 创建地图,添加聚合图层
图层聚合代码如下:
<!DOCTYPE html>
<html>
<head>
    <meta http-equiv="Content-Type" content="text/html; charset=utf-8" />
    <meta charset="utf-8" />
    <title>OpenLayers</title>
    <style>
        html, body, #map {
            width: 100%;
            height: 100%;
            margin: 0;
            padding: 0;
        }
    </style>
    <link href="libs/ol/ol.css" rel="stylesheet" />
    <script src="libs/ol/ol.js"></script>
</head>
<body>
    <div id="map"></div>

    <script>
        // 随机创建1000个要素
        var source = new ol.source.Vector();
        for (var i = 1; i <= 200; i++) {
            var coordinates = [120.00 + Math.random(), 30.00 + Math.random()];
            var feature = new ol.Feature(new ol.geom.Point(coordinates));
            source.addFeature(feature);
        }
        for (var i = 1; i <= 200; i++) {
            var coordinates = [120.01 + Math.random(), 30.01 + Math.random()];
            var feature = new ol.Feature(new ol.geom.Point(coordinates));
            source.addFeature(feature);
        }
        for (var i = 1; i <= 200; i++) {
            var coordinates = [120.02 + Math.random(), 30.02 + Math.random()];
            var feature = new ol.Feature(new ol.geom.Point(coordinates));
            source.addFeature(feature);
        }
        for (var i = 1; i <= 200; i++) {
            var coordinates = [120.03 + Math.random(), 30.03 + Math.random()];
            var feature = new ol.Feature(new ol.geom.Point(coordinates));
            source.addFeature(feature);
        }
        for (var i = 1; i <= 200; i++) {
            var coordinates = [120.04 + Math.random(), 30.04 + Math.random()];
            var feature = new ol.Feature(new ol.geom.Point(coordinates));
            source.addFeature(feature);
        }

        // 聚合
        var cluster = new ol.source.Cluster({
            source: source,
            distance: 100
        })

        // 创建图层
        var layer = new ol.layer.Vector({
            source: cluster,
            style: function (feature, resolution) {
                var size = feature.get('features').length;
                var style = new ol.style.Style({
                    image: new ol.style.Circle({
                        radius: 30,
                        stroke: new ol.style.Stroke({
                            color: 'white'
                        }),
                        fill: new ol.style.Fill({
                            color: 'blue'
                        })
                    }),
                    text: new ol.style.Text({
                        text: size.toString(),
                        fill: new ol.style.Fill({
                            color: 'white'
                        })
                    })
                })
                return style;
            }
        });

        // 创建地图
        var map = new ol.Map({
            target: 'map',
            layers: [
                new ol.layer.Tile({
                    source: new ol.source.OSM()
                }),
                layer
            ],
            view: new ol.View({
                projection: 'EPSG:4326',
                center: [120, 30],
                zoom: 10,
                minZoom: 5,
                maxZoom: 14
            })
        });
    </script>
</body>
</html>
运行结果如下图所示:
3、聚合特殊处理一
上面的代码虽然实现了点要素图层的聚合,但其实存在着一个问题:地图缩放层级最大时仍然保持着聚合效果,如下图所示:
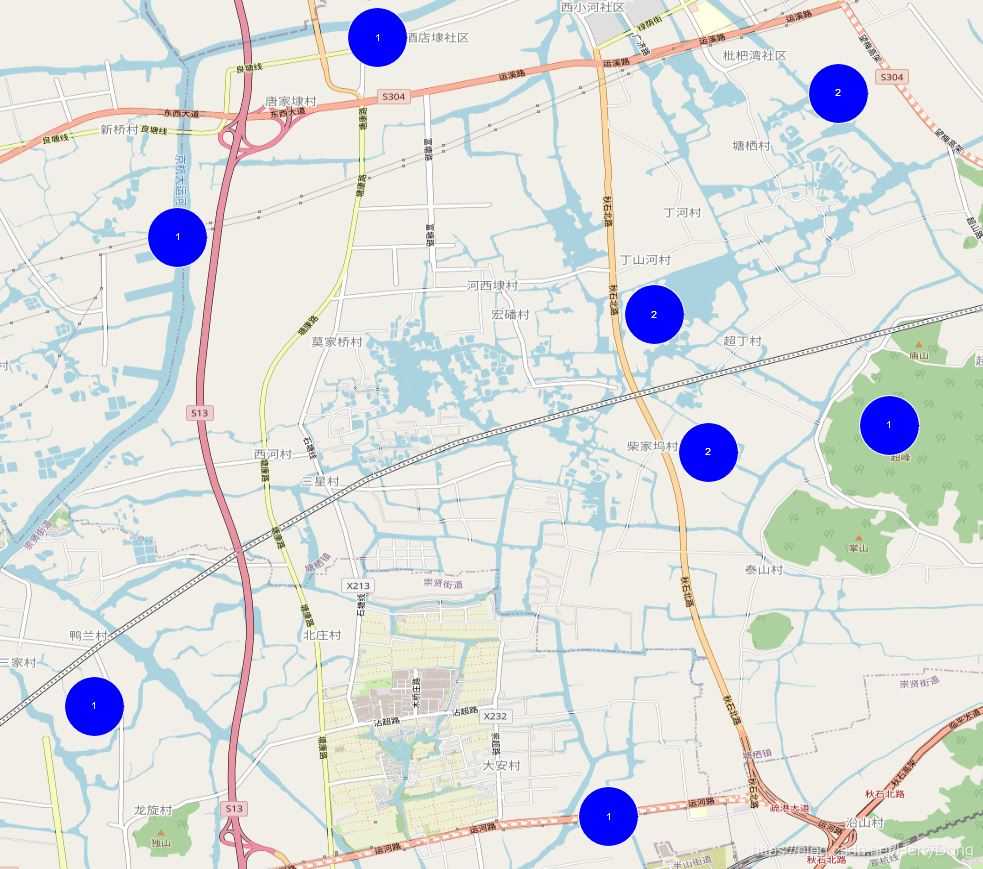
一般来说,当某处只有一个点时就应该取消聚合效果,这时候我们就需要在style: function (feature, resolution)这个回调函数里做文章了,代码如下:
<!DOCTYPE html>
<html>
<head>
    <meta http-equiv="Content-Type" content="text/html; charset=utf-8" />
    <meta charset="utf-8" />
    <title>OpenLayers</title>
    <style>
        html, body, #map {
            width: 100%;
            height: 100%;
            margin: 0;
            padding: 0;
        }
    </style>
    <link href="libs/ol/ol.css" rel="stylesheet" />
    <script src="libs/ol/ol.js"></script>
</head>
<body>
    <div id="map"></div>

    <script>
        // 随机创建1000个要素
        var source = new ol.source.Vector();
        for (var i = 1; i <= 200; i++) {
            var coordinates = [120.00 + Math.random(), 30.00 + Math.random()];
            var feature = new ol.Feature(new ol.geom.Point(coordinates));
            source.addFeature(feature);
        }
        for (var i = 1; i <= 200; i++) {
            var coordinates = [120.01 + Math.random(), 30.01 + Math.random()];
            var feature = new ol.Feature(new ol.geom.Point(coordinates));
            source.addFeature(feature);
        }
        for (var i = 1; i <= 200; i++) {
            var coordinates = [120.02 + Math.random(), 30.02 + Math.random()];
            var feature = new ol.Feature(new ol.geom.Point(coordinates));
            source.addFeature(feature);
        }
        for (var i = 1; i <= 200; i++) {
            var coordinates = [120.03 + Math.random(), 30.03 + Math.random()];
            var feature = new ol.Feature(new ol.geom.Point(coordinates));
            source.addFeature(feature);
        }
        for (var i = 1; i <= 200; i++) {
            var coordinates = [120.04 + Math.random(), 30.04 + Math.random()];
            var feature = new ol.Feature(new ol.geom.Point(coordinates));
            source.addFeature(feature);
        }

        // 聚合
        var cluster = new ol.source.Cluster({
            source: source,
            distance: 100
        })

        // 创建图层
        var layer = new ol.layer.Vector({
            source: cluster,
            style: function (feature, resolution) {
                var size = feature.get('features').length;
                if (size == 1) {
                    return new ol.style.Style({
                        image: new ol.style.Icon({
                            src: 'img/location.png'
                        })
                    })
                }
                else {
                    return new ol.style.Style({
                        image: new ol.style.Circle({
                            radius: 30,
                            stroke: new ol.style.Stroke({
                                color: 'white'
                            }),
                            fill: new ol.style.Fill({
                                color: 'blue'
                            })
                        }),
                        text: new ol.style.Text({
                            text: size.toString(),
                            fill: new ol.style.Fill({
                                color: 'white'
                            })
                        })
                    })
                }
            }
        });

        // 创建地图
        var map = new ol.Map({
            target: 'map',
            layers: [
                new ol.layer.Tile({
                    source: new ol.source.OSM()
                }),
                layer
            ],
            view: new ol.View({
                projection: 'EPSG:4326',
                center: [120, 30],
                zoom: 10,
                minZoom: 5,
                maxZoom: 14
            })
        });
    </script>
</body>
</html>
运行结果如下图所示:
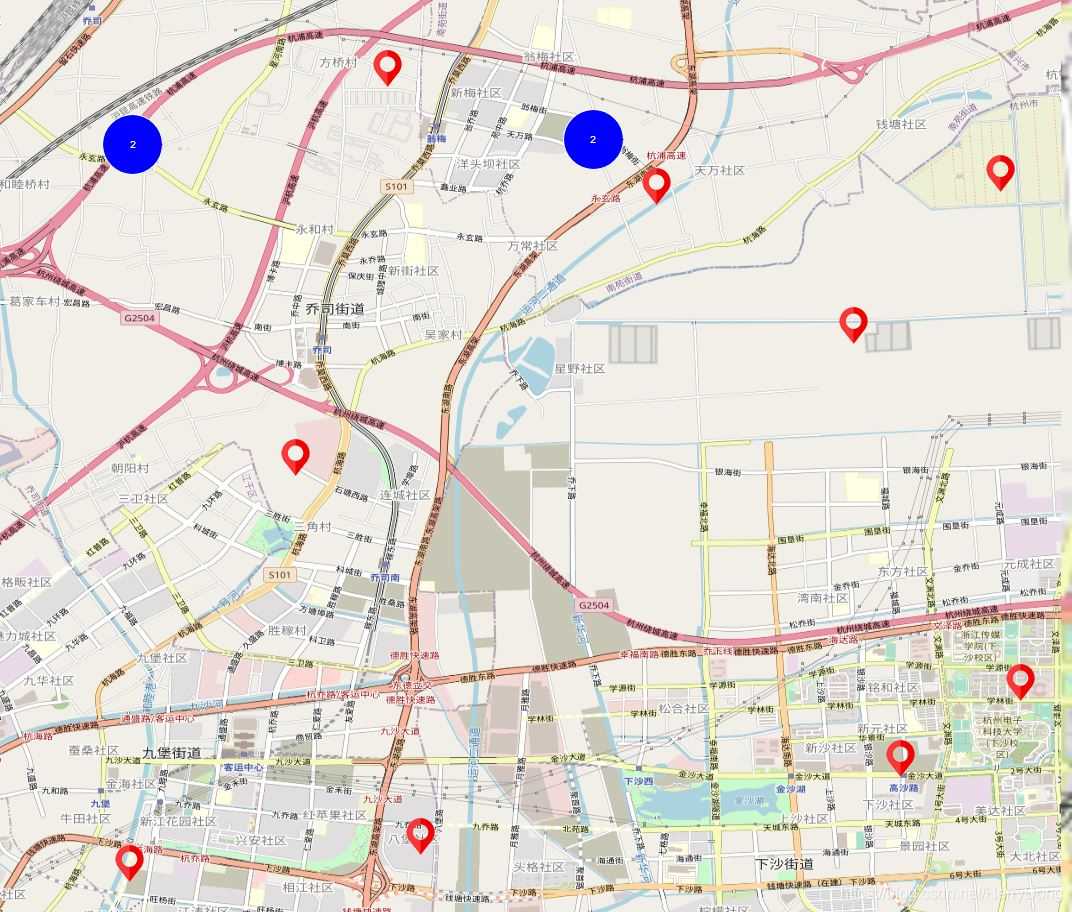
其实这个效果实现起来很简单,核心代码就是:var size = feature.get('features').length;,如果size>1,则返回聚合样式,反之则返回图片样式。
4、聚合特殊处理二
在上面的代码中,我把地图的最大缩放层级设置为14,这也就导致了一个问题:当地图缩放到最大层级时,还有很多点保持着聚合效果。有时候用户可能会要求:当地图缩放到最大层级时,取消全部聚合效果。如果要实现这个功能,我们就需要对地图事件进行监听了,代码如下:
<!DOCTYPE html>
<html>
<head>
    <meta http-equiv="Content-Type" content="text/html; charset=utf-8" />
    <meta charset="utf-8" />
    <title>OpenLayers</title>
    <style>
        html, body, #map {
            width: 100%;
            height: 100%;
  荷兰服务器http://www.558idc.com/helan.html          margin: 0;
            padding: 0;
        }
    </style>
    <link href="libs/ol/ol.css" rel="stylesheet" />
    <script src="libs/ol/ol.js"></script>
</head>
<body>
    <div id="map"></div>

    <script>
        // 随机创建1000个要素
        var source = new ol.source.Vector();
        for (var i = 1; i <= 200; i++) {
            var coordinates = [120.00 + Math.random(), 30.00 + Math.random()];
            var feature = new ol.Feature(new ol.geom.Point(coordinates));
            source.addFeature(feature);
        }
        for (var i = 1; i <= 200; i++) {
            var coordinates = [120.01 + Math.random(), 30.01 + Math.random()];
            var feature = new ol.Feature(new ol.geom.Point(coordinates));
            source.addFeature(feature);
        }
        for (var i = 1; i <= 200; i++) {
            var coordinates = [120.02 + Math.random(), 30.02 + Math.random()];
            var feature = new ol.Feature(new ol.geom.Point(coordinates));
            source.addFeature(feature);
        }
        for (var i = 1; i <= 200; i++) {
            var coordinates = [120.03 + Math.random(), 30.03 + Math.random()];
            var feature = new ol.Feature(new ol.geom.Point(coordinates));
            source.addFeature(feature);
        }
        for (var i = 1; i <= 200; i++) {
            var coordinates = [120.04 + Math.random(), 30.04 + Math.random()];
            var feature = new ol.Feature(new ol.geom.Point(coordinates));
            source.addFeature(feature);
        }

        // 聚合
        var cluster = new ol.source.Cluster({
            source: source,
            distance: 100
        })

        // 创建图层
        var layer = new ol.layer.Vector({
            source: cluster,
            style: function (feature, resolution) {
                var size = feature.get('features').length;
                if (size == 1) {
                    return new ol.style.Style({
                        image: new ol.style.Icon({
                            src: 'img/location.png'
                        })
                    })
                }
                else {
                    return new ol.style.Style({
                        image: new ol.style.Circle({
                            radius: 30,
                            stroke: new ol.style.Stroke({
                                color: 'white'
                            }),
                            fill: new ol.style.Fill({
                                color: 'blue'
                            })
                        }),
                        text: new ol.style.Text({
                            text: size.toString(),
                            fill: new ol.style.Fill({
                                color: 'white'
                            })
                        })
                    })
                }
            }
        });

        // 创建地图
        var map = new ol.Map({
            target: 'map',
            layers: [
                new ol.layer.Tile({
                    source: new ol.source.OSM()
                }),
                layer
            ],
            view: new ol.View({
                projection: 'EPSG:4326',
                center: [120, 30],
                zoom: 10,
                minZoom: 5,
                maxZoom: 14
            })
        });

        // 监听地图分辨率改变事件
        map.getView().on('change:resolution', function (event) {
            if (map.getView().getZoom() == map.getView().getMaxZoom()) {
                cluster.setDistance(0);
            }
            else {
                cluster.setDistance(100);
            }
        })
    </script>
</body>
</html>
运行结果如下图所示:
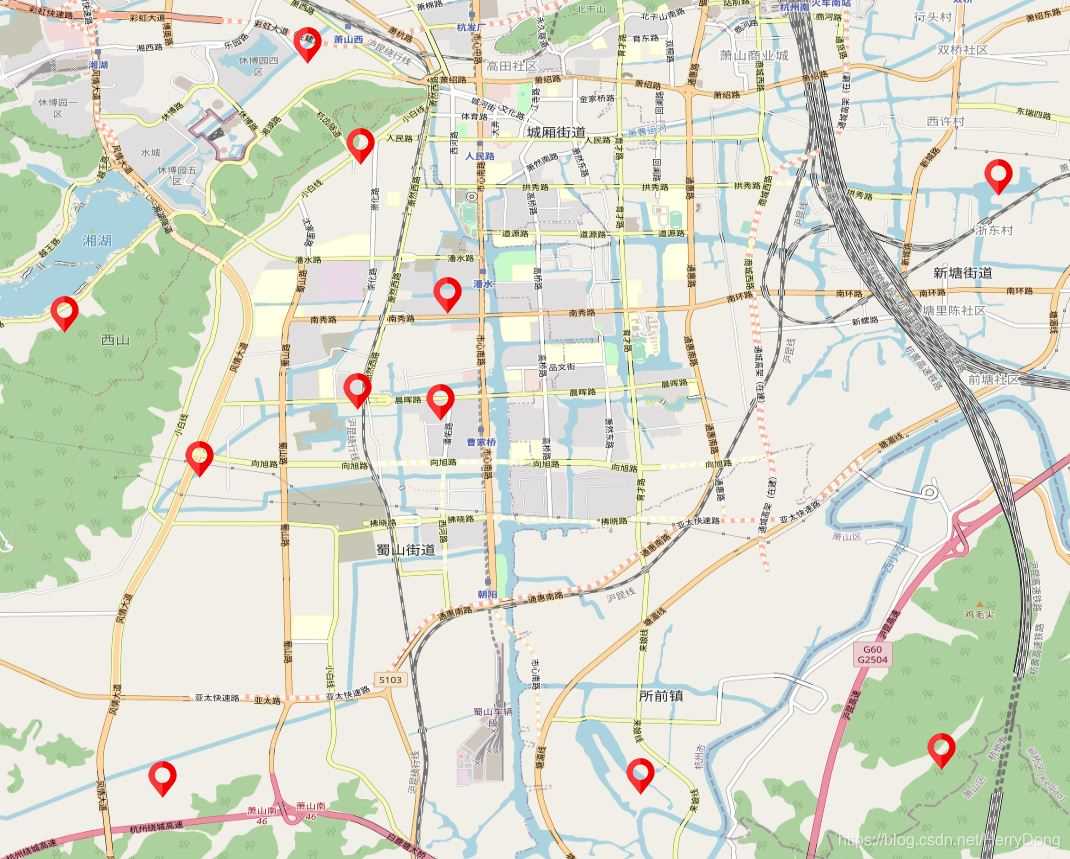
这个效果的实现也很简单,只需要监听当前地图的分辨率变化事件,如果当前缩放层级已经是最大层级,则将聚合的距离设置为0即可。
5.、结语
在要素数量很多的情况下,我们应该考虑对其进行聚合处理,这样不仅提升了用户的使用感受,而且也可以避免界面卡顿。其实在上面的代码中,我对change:resolution事件进行了监听,你也可以换成另一个事件——moveend,代码如下所示:
map.on('moveend', function (event) {
    if (map.getView().getZoom() == map.getView().getMaxZoom()) {
        cluster.setDistance(0);
    }
    else {
        cluster.setDistance(100);
    }
});
对moveend事件进行监听也可以实现相同的效果,因为无论是地图的缩放、平移都会触发该事件。
到此这篇关于OpenLayers实现点要素图层的聚合显示的方法的文章就介绍到这了,更多相关OpenLayers 点要素图层的聚合显示内容请搜索hwidc以前的文章或继续浏览下面的相关文章希望大家以后多多支持hwidc!
