Qt5.9实现简单的多线程实例(类QThread)
Qt开启多线程,主要用到类QThread。有两种方法,第一种用一个类继承QThread,然后重新改写虚函数run()。当要开启新线程时,只需要实例该类,然后调用函数start(),就可以开启一条多线程。第二种方法是继承一个QObject类,然后利用moveToThread()函数开启一个线程槽函数,将要花费大量时间计算的代码放入该线程槽函数中。第二种方法可以参考我写的另一篇博客:https://www.jb51.net/article/223796.htm
下面我总结的主要是第一种方法。(注意:只有在run()函数里面才是新的线程,所有复杂逻辑都应该在run()函数里面做。当run()函数运行完毕后,该线程生命周期结束。)
创建多线程步骤如下:
a1新建一个类MyThread,基类为QThread。
a2重写类MyThread的虚函数void run();,即新建一个函数protected void run(),然后对其进行定义。
a3在需要用到多线程的地方,实例MyThread,然后调用函数MyThread::start()后,则开启一条线程,自动运行函数run()。
a4当停止线程时,调用MyThread::wait()函数,等待线程结束,并且回收线程资源。
1.1新建一个widget工程,不要勾选ui界面。然后分别在mythread.h,mythread.cpp,widget.h,widget.cpp,main.cpp分别添加如下代码。
mythread.h
#ifndef MYTHREAD_H
#define MYTHREAD_H

#include <QThread>

class MyThread : public QThread
{
public:
    MyThread();
    void closeThread();

protected:
    virtual void run();

private:
    volatile bool isStop;       //isStop是易失性变量,需要用volatile进行申明
};

#endif // MYTHREAD_H
mythread.cpp
#include "mythread.h"
#include <QDebug>
#include <QMutex>

MyThread::MyThread()
{
    isStop = false;
}

void MyThread::closeThread()
{
    isStop = true;
}

void MyThread::run()
{
    while (1)
    {
        if(isStop)
            return;
        qDebug()<<tr("mythread QThread::currentThreadId()==")<<QThread::currentThreadId();
        sleep(1);
    }
}
widget.h
#ifndef WIDGET_H
#define WIDGET_H

#include <QWidget>
#include <mythread.h>
#include <QPushButton>
#include <QVBoxLayout>
#include <QMutex>

class Widget : public QWidget
{
    Q_OBJECT

public:
    Widget(QWidget *parent = 0);
    ~Widget();
    void createView();

private slots:
    void openThreadBtnSlot();
    void closeThreadBtnSlot();
    void finishedThreadBtnSlot();
//    void testBtnSlot();

private:
    QVBoxLayout *mainLayout;
    MyThread *thread1;
};

#endif // WIDGET_H
widget.cpp
#include "widget.h"
#include <QDebug>
#include <windows.h>

Widget::Widget(QWidget *parent)
    : QWidget(parent)
{
    createView();
}

void Widget::createView()
{
    /*添加界面*/
    QPushButton *openThreadBtn = new QPushButton(tr("打开线程"));
    QPushButton *closeThreadBtn = new QPushButton(tr("关闭线程"));
    mainLayout = new QVBoxLayout(this);
    mainLayout->addWidget(openThreadBtn);
    mainLayout->addWidget(closeThreadBtn);
    mainLayout->addStretch();
    connect(openThreadBtn,SIGNAL(clicked(bool)),this,SLOT(openThreadBtnSlot()));
    connect(closeThreadBtn,SIGNAL(clicked(bool)),this,SLOT(closeThreadBtnSlot()));

    /*线程初始化*/
    thread1 = new MyThread;
    connect(thread1,SIGNAL(finished()),this,SLOT(finishedThreadBtnSlot()));
}

void Widget::openThreadBtnSlot()
{
    /*开启一个线程*/
    thread1->start();
    qDebug()<<"主线程id:"<<QThread::currentThreadId();
}

void Widget::closeThreadBtnSlot()
{
    /*关闭多线程*/
    thread1->closeThread();
    thread1->wait();
}

void Widget::finishedThreadBtnSlot()
{
    qDebug()<<tr("完成信号finished触发");
}

Widget::~Widget()
{
}
main.cpp
#include "widget.h"
#include <QApplication>

int main(int argc, char *argv[])
{
    QApplication a(argc, argv);
    Widget w;
    w.resize(960,640);
    w.show();

    return a.exec();
}
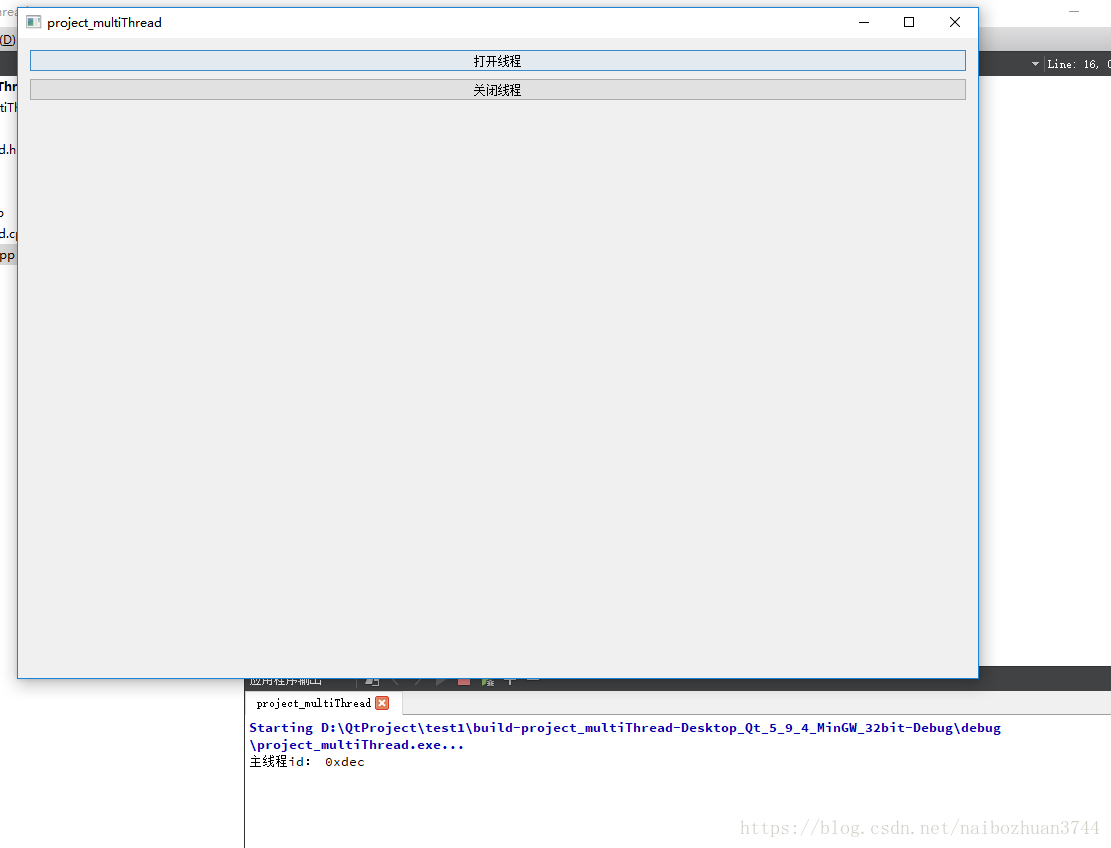
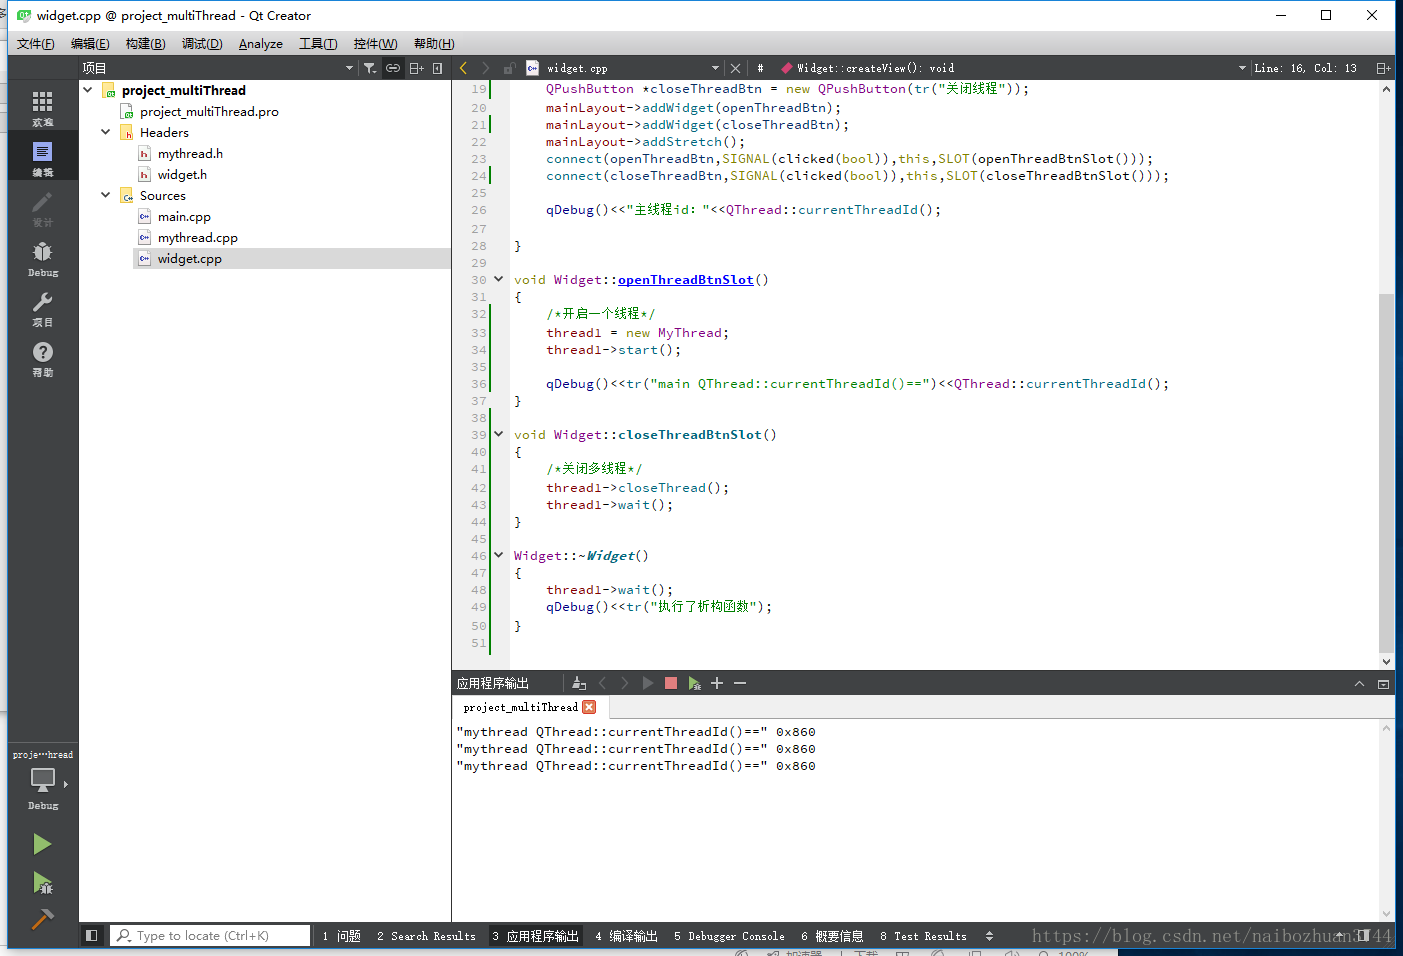
1.2程序构建和运行后,结果如下图所示:


参考内容:
https://blog.csdn.net/czyt1988/article/details/64441443(正确终止线程经典教程)
https://blog.csdn.net/MyCodingLine/article/details/48597935
https://blog.csdn.net/xipiaoyouzi/article/details/8450704
https://blog.csdn.net/qq769651718/article/details/79357933(两种创建多线程方式)
https://blog.csdn.net/czyt1988/article/details/71194457
到此这篇关于Qt5.9实现简单的多线程实例(类QThread)的文章就介绍到这了,更多相关Qt5.9 多线程内容请搜索海外IDC网以前的文章或继续浏览下面的相关文章希望大家以后多多支持海外IDC网!
【文章来源:http://www.1234xp.com/mggfzq.html网络转载请说明出处】