Unity实现引导页效果
本文实例为大家分享了Unity实现引导页效果的具体代码,供大家参考,具体内容如下
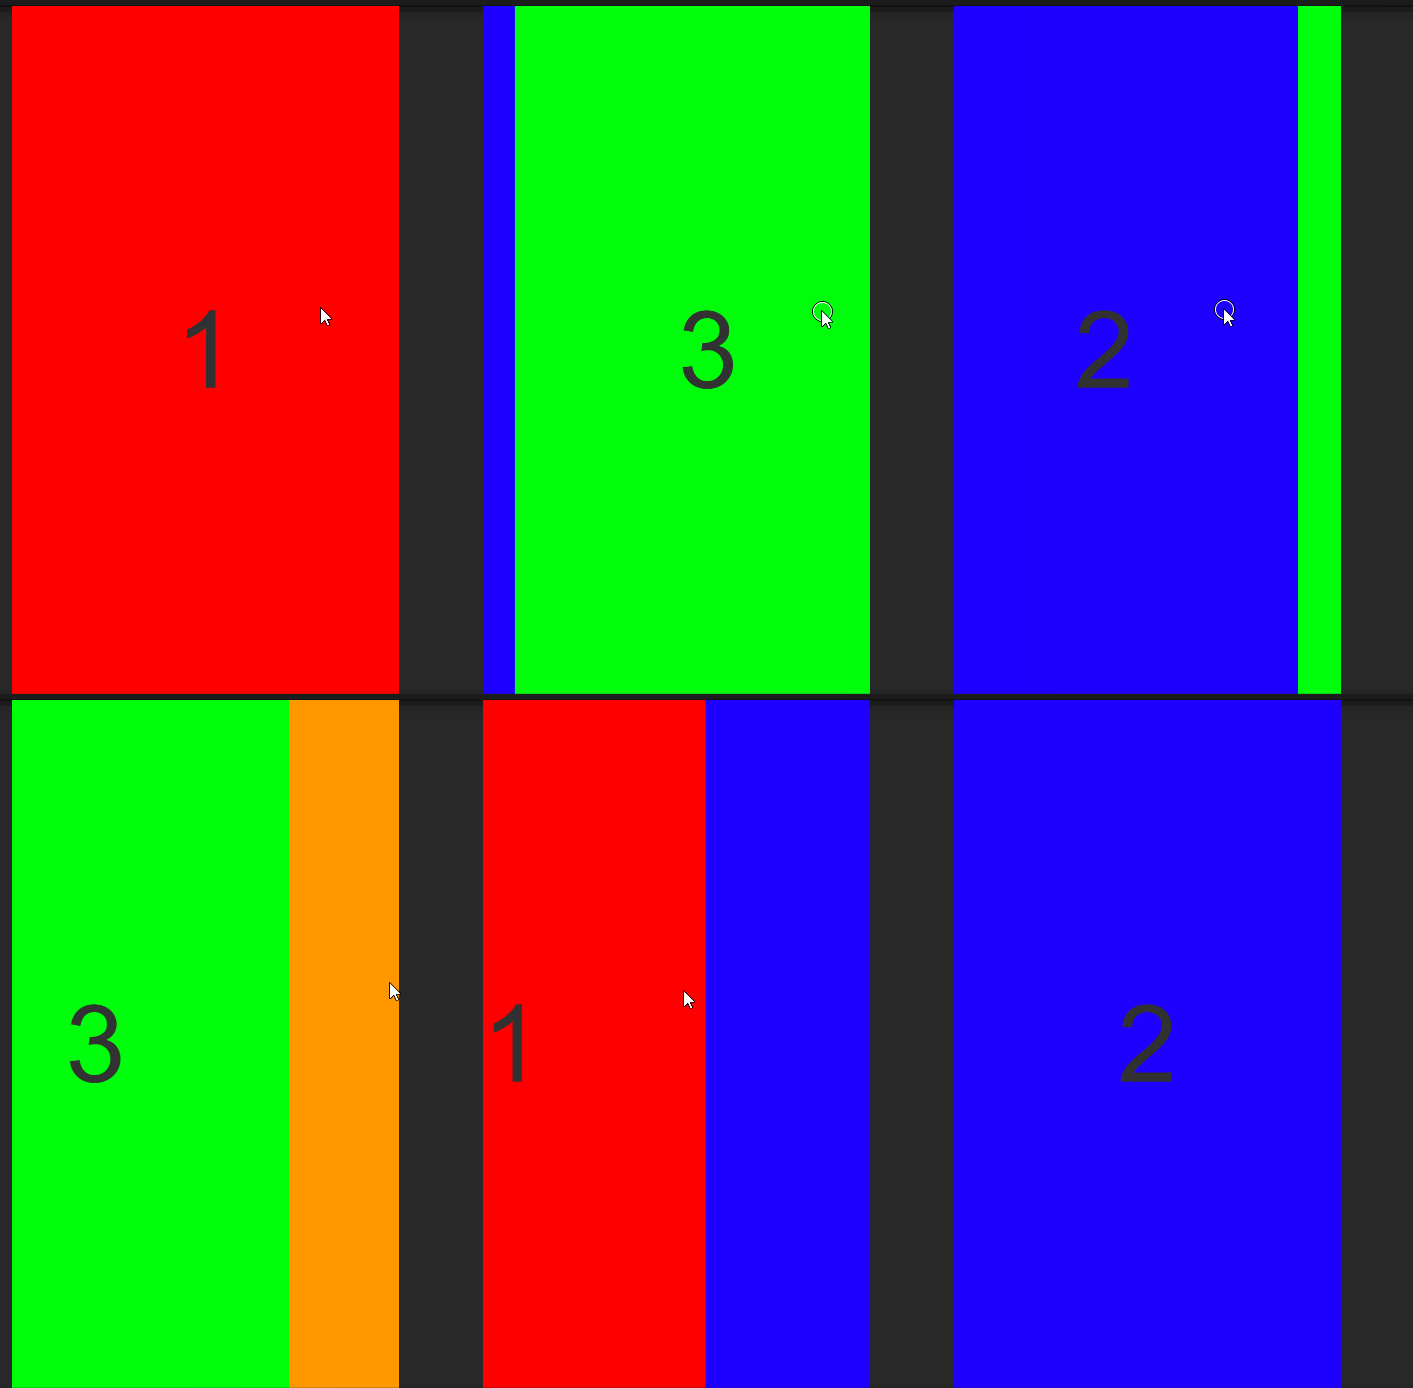
效果图:

1、创建Canvas,设置RenderMode=ScreenSpace-Overlay,UIScaleMode = ScaleWithScreenSize,
ReferenceResolution(x=1080,y=1920)
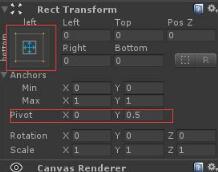
2、创建一个RawImage,命名为(parentGoImg),并做如下设置

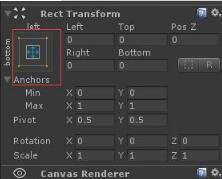
3、在parentGoImg下建几个RawImage,赋予想展示的图片,并做如下设置

4、添加如下脚本给parentGoImg
using System.Collections;
using System.Collections.Generic;
using UnityEngine;
using UnityEngine.EventSystems;
using DG.Tweening;
using UnityEngine.UI;

public class Asd : MonoBehaviour,IBeginDragHandler, IDragHandler,IEndDragHandler
{
  /// <summary>
  /// 可移动的最大最小X轴坐标
  /// </summary>
  private float minX, maxX;
  /// <summary>
  /// 开始触摸时,算出偏移值,防止跳变
  /// </summary>
  private float offsetX;

  /// <summary>
  /// 灵敏度
  /// </summary>
  private float sensitivityX;
  /// <summary>
  /// 当前显示第几页
  /// </summary>
  private int currentShowIndex = 1;

  private void Start()
  {
    (transform as RectTransform).pivot = new Vector2(0, 0.5f);
    Debug.Log(Screen.width + "  " + Screen.height);
    for (int i = 0; i < transform.childCount; i++)
    {
      (transform.GetChild(i) as RectTransform).sizeDelta = new Vector2(0, 0);
      //canvas的RenderMode要设置成Overlay形式
      //这里i*1080是因为canvas的UIScaleMode设置成了ScaleWithS【本文来源:迪拜服务器 转载请说明出处】creenSize,Resolution为x=1080,y=1920
      //如果canvas的UIScaleMode设置成ConstantPixelSize则吧这里的i*1080改成i*Screen.width
      (transform.GetChild(i) as RectTransform).anchoredPosition = new Vector2(i * 1080.0f, 0);
    }

    minX = -((transform.childCount - 1) * Screen.width);
    maxX = 0.0f;
    //如果移动超过页面的五分之一,则切换页面
    sensitivityX = Screen.width / 5;
  }

  public void OnBeginDrag(PointerEventData eventData)
  {
    offsetX = transform.position.x - Input.mousePosition.x;
  }

  public void OnDrag(PointerEventData eventData)
  {
    //将物体坐标限制在最大最小X轴坐标内
    transform.position = new Vector2(Input.mousePosition.x + offsetX, transform.position.y);
    if (transform.position.x <= minX)
    {
      transform.position = new Vector2(minX, transform.position.y);
    }
    else if (transform.position.x >= maxX)
    {
      transform.position = new Vector2(maxX, transform.position.y);
    }
  }

  public void OnEndDrag(PointerEventData eventData)
  {
    //判断坐标,是否需要切换页面
    if (transform.position.x > GetLeftX())
    {
      currentShowIndex--;
    }
    else if (transform.position.x < GetRightX())
    {
      currentShowIndex++;
    }
    transform.DOMoveX(-(currentShowIndex - 1) * Screen.width, 0.2f);
  }

  float GetLeftX() {
    return -((currentShowIndex - 1) * Screen.width - sensitivityX);
  }

  float GetRightX() {
    return -((currentShowIndex - 1) * Screen.width + sensitivityX);
  }
}
运行即可看到效果
以上就是本文的全部内容,希望对大家的学习有所帮助,也希望大家多多支持海外IDC网。
