C#WinFrom导出Excel过程解析
这篇文章主要介绍了C#WinFrom导出Excel过程解析,文中通过示例代码介绍的非常详细,对大家的学习或者工作具有一定的参考学习价值,需要的朋友可以参考下
采用的是以DataGridView的形式导出,使用NPOI.dll
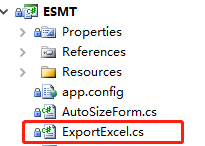
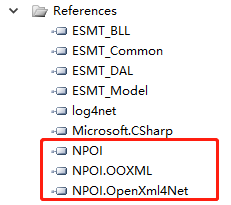
1.由于使用的是DataGridView,所以类需要创建在From的Project下,DLL导入NPOI


2.代码如下
ExportExcel
using System;
using System.Collections.Generic;
using System.Linq;
using System.Text;
using System.Windows.Forms;
using NPOI.SS.UserModel;    //NPOI
using NPOI.HSSF.Util;      //NPOI
using NPOI.HSSF.UserModel;   //NPOI
using NPOI.X【文章出处:国外服务器 转发请说明出处】SSF.UserModel;   //NPOI
using System.IO;
namespace ESMT
{
  public class ExportExcel
  {
    /// <summary>
    ///
    /// </summary>
    /// <param name="grdview">数据表</param>
    /// <param name="sheetName">工作簿名字</param>
    /// <param name="FilePath">文件路径</param>
    /// <param name="columnTitle">列头</param>
    public void ExportToExcel(DataGridView grdview, string sheetName, string FilePath, string[] columnTitle)
    {

      //不允许dataGridView显示添加行,负责导出时会报最后一行未实例化错误
      grdview.AllowUserToAddRows = false;
      HSSFWorkbook workbook = new HSSFWorkbook();
      ISheet sheet = workbook.CreateSheet(sheetName);//创建工作簿
      //设置表头
      IRow headerRow = sheet.CreateRow(0);//创建第一行
      headerRow.HeightInPoints = 40;
      headerRow.CreateCell(0).SetCellValue("出库表单");//单元格赋值
      ICellStyle headStyle = workbook.CreateCellStyle();
      headStyle.Alignment = NPOI.SS.UserModel.HorizontalAlignment.Center;//格式居中
      IFont font = workbook.CreateFont();
      font.Boldweight = 500;
      font.FontHeightInPoints = 20;
      headStyle.SetFont(font);
      headerRow.GetCell(0).CellStyle = headStyle;
      sheet.AddMergedRegion(new NPOI.SS.Util.CellRangeAddress(0, 0, 0, grdview.ColumnCount - 2));//单元格合并 最后个参数是合并个数

      IRow headerRow2 = sheet.CreateRow(1);//创建第二行列头
      ICellStyle headStyle2 = workbook.CreateCellStyle();
      headStyle2.Alignment = NPOI.SS.UserModel.HorizontalAlignment.Center;
      IFont font2 = workbook.CreateFont();
      font2.FontHeightInPoints = 10;
      font2.Boldweight = 700;
      headStyle2.SetFont(font2);
      for (int l = 0; l < grdview.ColumnCount - 1; l++) //列头填值
      {
        headerRow2.CreateCell(l).SetCellValue(columnTitle[l]);
        headerRow2.GetCell(l).CellStyle = headStyle2;
      }

      //设置列宽
      for (int l = 0; l < grdview.Columns.Count; l++)
      {
        sheet.DefaultColumnWidth = 15;
      }

      //填写内容
      for (int i = 0; i < grdview.Rows.Count; i++)
      {
        IRow row = sheet.CreateRow(i + 2);
        for (int j = 1; j < grdview.Columns.Count; j++)
        {
          row.CreateCell(j - 1, CellType.String).SetCellValue(grdview.Rows[i].Cells[j].Value.ToString());//j-1表示哪个单元格
        }
      }

      using (FileStream stream = File.OpenWrite(FilePath))//创建Excel并写入数据
      {
        workbook.Write(stream);
        stream.Close();
      }
      GC.Collect();
    }
  }
}
PS:openwtrie 打开或者创建新的文件写入
3.From窗口点击导出按钮
导出按钮
string[] columnTitle = { "序号", "仓位", "Facility", "供应商料号", "料号", "料卷ID", "料卷数量", "储位号", "Date Code/Lot", "生产日期", "供应商编码", "入仓时间" };
      string localFilePath = "";// fileNameExt, newFileName, FilePath;
      SaveFileDialog sfd = new SaveFileDialog();//保存文件窗口
      //设置文件类型
      sfd.Filter = "Excel(97-2003)|*.xls";//保存类型为EXCEL
      //保存对话框是否记忆上次打开的目录
      sfd.RestoreDirectory = true;

      //点了保存按钮进入
      if (sfd.ShowDialog() == DialogResult.OK)
      {
        localFilePath = sfd.FileName.ToString(); //获得文件路径
        ex.ExportToExcel(grdData, "出库表单", localFilePath, columnTitle);
      }
通过以上三步,完成点击导出按钮,后选择保存位置并命名,调用EportExcel方法完成导出Excel。
以上就是本文的全部内容,希望对大家的学习有所帮助,也希望大家多多支持海外IDC网。
