C#窗体间常用的几种传值方式及委托与事件详解
前言
窗体间的传值,最好使用委托方式传值,开始之前,我们先来说一下委托与事件的关系。
委托:是一个类。
事件:是委托类型的一个特殊实例,只能在类的内部触发执行。
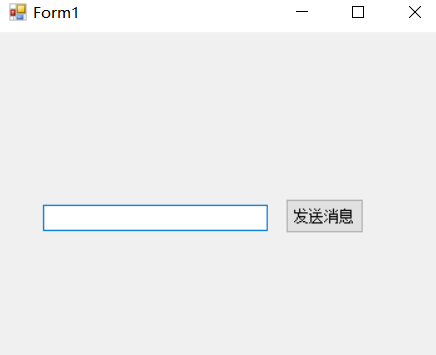
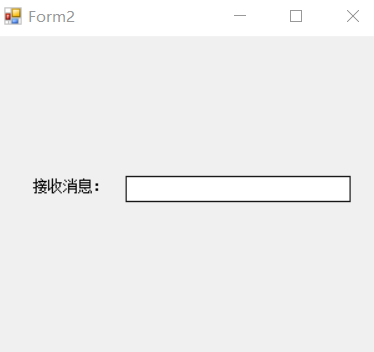
首先创建2个窗体,这里我们以form1为发送窗体,form2为接收窗体
form1窗体

form2窗体

方式一(最简单的方式)
form1窗体代码
using System;
using System.Collections.Generic;
using System.ComponentModel;
using System.Data;
using System.Drawing;
using System.Linq;
using System.Text;
using System.Threading.Tasks;
using System.Windows.Forms;


namespace 事件的方式实现窗体间传值
{
 public partial class Form1 : Form
 {
 public Form1()
 {
  InitializeComponent();
 }
 public Form2 msgFrm { get; set; }
 private void Form1_Load(object sender, EventArgs e)
 {
  Form2 f2 = new Form2();
  msgFrm = f2;
  f2.Show();
 }

 private void btnSendMsg_Click(object sender, EventArgs e)
 {
  //对象内部的,字段或者元素属性最好不要直接让外部直接访问
  //最好是通过,设置的方法来控制一下
  msgFrm.SetTxt(this.txtMsg.Text);

 }
 }
}
form2窗体代码
using System;
using System.Collections.Generic;
using System.ComponentModel;
using System.Data;
using System.Drawing;
using System.Linq;
using System.Text;
using System.Threading.Tasks;
using System.Windows.Forms;

namespace 事件的方式实现窗体间传值
{
 public partial class Form2 : Form
 {
  public Form2()
  {
   InitializeComponent();
  }
  public void SetTxt(string txt)
  {
   this.txtMsg.Text = txt;
  }
 }
}
方式二(委托方式)
注:委托不熟悉的宝宝们,请自行查阅Func与Action,以及delegate三者区别,这里我们用系统内置的委托Action
form1窗体代码
using System;
using System.Collections.Generic;
using System.ComponentModel;
using System.Data;
using System.Drawing;
using System.Linq;
using System.Text;
using System.Threading.Tasks;
using System.Windows.Forms;


namespace 事件的方式实现窗体间传值
{
 public partial class Form1 : Form
 {
  public Form1()
  {
   InitializeComponent();
  }
  //定义委托
  public Action<string> afterMsgSend { get; set; }
  private void Form1_Load(object sender, EventArgs e)
  {
   Form2 f2 = new Form2();
   afterMsgSend += f2.SetTxt; //给系统内置的委托注册事件
   f2.Show();
  }

  private void btnSendMsg_Click(object sender, EventArgs e)
  {
   if (afterMsgSend == null)
   {
    return;
   }
   afterMsgSend(this.txtMsg.Text);
  }
 }
}
form2窗体代码
using System;
using System.Collections.Generic;
using System.ComponentModel;
using System.Data;
using System.Drawing;
using System.Linq;
using System.Text;
using System.Threading.Tasks;
using System.Windows.Forms;

namespace 事件的方式实现窗体间传值
{
 public partial class Form2 : Form
 {
  public Form2()
  {
   InitializeComponent();
  }
  public void SetTxt(string txt)
  {
   this.txtMsg.Text = txt;
  }
 }
}
方式三(事件方式,更安全哟)
TextBoxMsgChangeEventArg类继承EventArgs代码
using System;
using System.Collections.Generic;
using System.Linq;
using System.Text;
using System.Threading.Tasks;

namespace 事件的方式实现窗体间传值
{
 public class TextBoxMsgChangeEventArg:EventArgs
 {
  public string Text { get; set; }【本文由:http://www.1234xp.com/rbzq.html 复制请保留原URL】
 }
}
form1窗体代码
using System;
using System.Collections.Generic;
using System.ComponentModel;
using System.Data;
using System.Drawing;
using System.Linq;
using System.Text;
using System.Threading.Tasks;
using System.Windows.Forms;


namespace 事件的方式实现窗体间传值
{
 public partial class Form1 : Form
 {
  public Form1()
  {
   InitializeComponent();
  }
  public event EventHandler AfterMsgChange;
  private void Form1_Load(object sender, EventArgs e)
  {
   Form2 f2 = new Form2();
   AfterMsgChange += f2.AfterTxtChange;
   f2.Show();
  }
  private void btnSendMsg_Click(object sender, EventArgs e)
  {
   AfterMsgChange(this, new TextBoxMsgChangeEventArg() { Text = this.txtMsg.Text });
  }
 }
}
form2窗体
using System;
using System.Collections.Generic;
using System.ComponentModel;
using System.Data;
using System.Drawing;
using System.Linq;
using System.Text;
using System.Threading.Tasks;
using System.Windows.Forms;

namespace 事件的方式实现窗体间传值
{
 public partial class Form2 : Form
 {
  public Form2()
  {
   InitializeComponent();
  }
  public void AfterTxtChange(object sender,EventArgs e)
  {
   //拿到父窗体传来的文本,强转数据类型
   TextBoxMsgChangeEventArg arg = e as TextBoxMsgChangeEventArg;
   this.SetTxt(arg.Text);
  }
 }
}
总结
以上就是这篇文章的全部内容了,希望本文的内容对大家的学习或者工作具有一定的参考学习价值,谢谢大家对海外IDC网的支持。
【转自:武汉seo优化 http://www.5h5q.com提供,感谢支持】