
PHP7安装gd扩展的方法
php7安装gd扩展的方法:首先通过“apt-get install php7.4-gd”命令安装gd扩展;然后配置gd到php的配置文件“php.ini”;最后重启php,并在phpinfo中查看是否安装成功即可。

推荐:《PHP视频教程》
场景 ubuntu PHP版本7.4 运行服务器 nginx
一、更新源
root@iZuf69urlacrut7qqxhcofZ:/web# sudo apt-get update
二、安装gd扩展
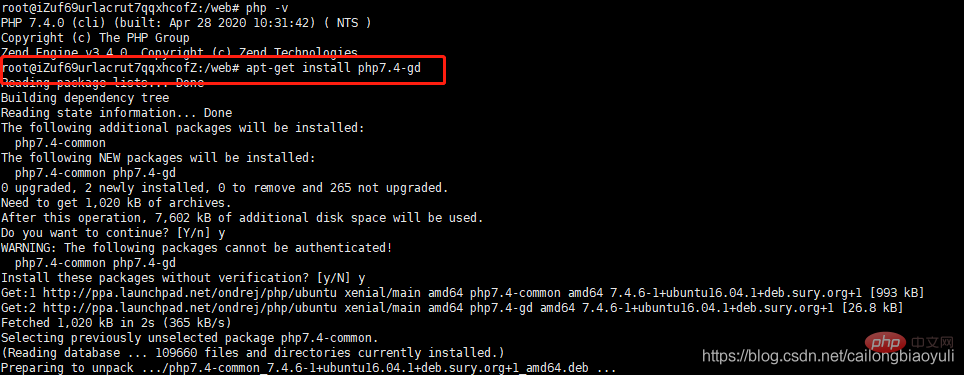
root@iZuf69urlacrut7qqxhcofZ:/web# apt-get install php7.4-gd
等待安装完成
三、配置gd到php的配置文件php.ini
3.1 首先要找到我们安装的gd的路径。可以用 find / -name gd.so 来找到文件
root@iZuf69urlacrut7qqxhcofZ:/web# find / -name gd.so
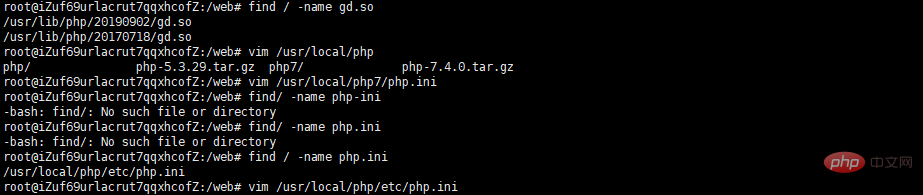
root@iZuf69urlacrut7qqxhcofZ:/web# vim /usr/local/php/etc/php.ini
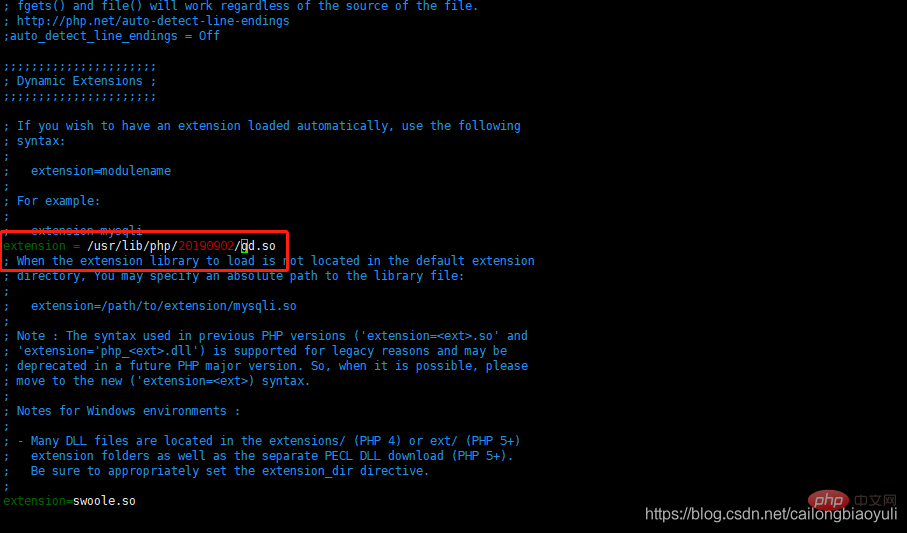
实际路径请根据大家服务器上为准。打开php.ini在 文件中加入一行。
extension = /usr/lib/php/20190902/gd.so
这里的路径请根据查找出来的实际路径替换。
四、重启php
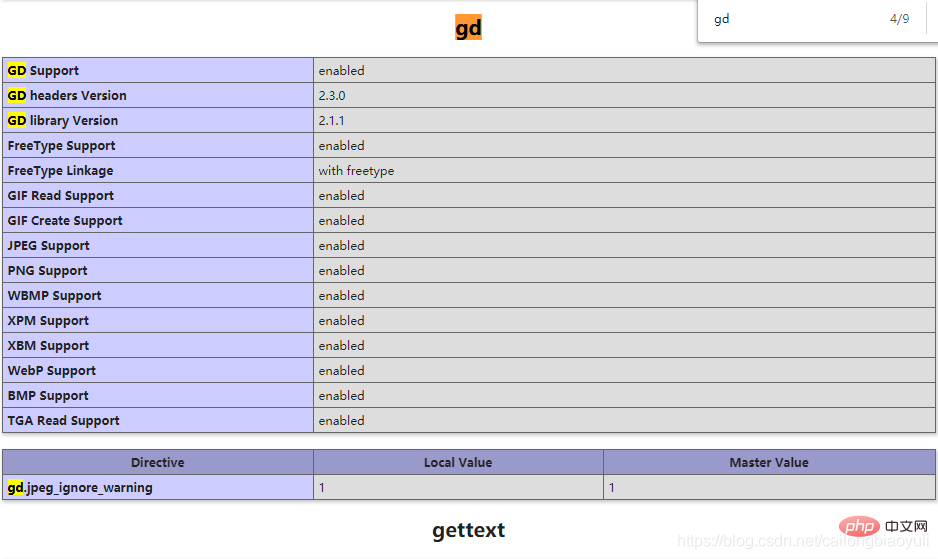
重启php后,在phpinfo中查看是否安装成功。
以上就是PHP7安装gd扩展的方法的详细内容,更多请关注自由互联其它相关文章!
【文章原创作者:香港云服务器 http://www.558idc.com/ne.html 复制请保留原URL】