vue封装组件之上传图片组件
本文实例为大家分享了vue上传图片组件的封装具体代码,供大家参考,具体内容如下
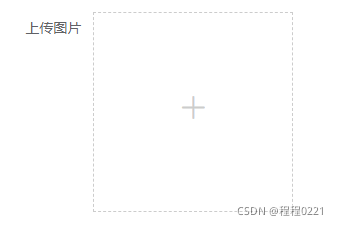
未上传状态

上传状态

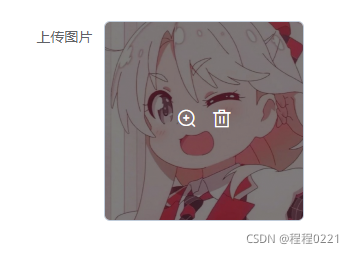
其他状态(查看/删除)

自定义组件文件名称 - 这里叫UploadImg.vue
<template>
  <div>
    <el-form>
      <!-- :on-change="uploadFile" -->
      <el-upload
        :limit="limit"   //最大允许上传个数
        action
        accept="image/*" //接受上传的
        :on-change="uploadFile" //文件状态改变时的函数
        list-type="picture-card" //文件列表的类型
        :auto-upload="false" //是否在选取文件后立即进行上传
        :file-list="fileList" //虚拟文件数组
        :on-exceed="handleExceed" //文件超出个数限制时的函数
        :on-preview="handlePictureCardPreview" //点击文件列表中已上传的文件时的函数
        :on-remove="handleRemove" //文件列表移除文件时的函数
        ref="upload"
        class="avatar-uploader"
        :class="{hide:showUpload}" //用来隐藏到达limit最大值之后 关闭上传按钮
        :disabled="disabled" //为查看不能上传进行处理
      >
        <i class="el-icon-plus"></i>
      </el-upload>
      //查看图片
      <el-dialog width="30%" :visible.sync="dialogVisible">
        <img width="100%" :src="imgUrl.url" alt />
      </el-dialog>
      //如果不是需要直接上传的,而是需要按钮点击再进行图片上传请打开此方法
      //上面的el-upload标签里on-change换成http-request方法
      <!-- <Button text="上 传" type="add_u" style="margin-top: 10px;" @click.native="submitUpload"></Button> -->
    </el-form>
  </div>
</template>

<script>
//引入上传图片接口
import { uploadImg } from "@/api/public/api";
export default {
  props: {
    limit: Number,
    fileList: Array,
    disabled: Boolean,
  },
  data() {
    return {
      showUpload: false, //控制limit最大值之后 关闭上传按钮
      dialogVisible: false, //查看图片弹出框
      imgUrl: [], //上传图片后地址合集
    };
  },
  //监听上传图片的数组(为了处理修改时,自动渲染问题,和上传按钮消失问题);
  watch: {
    fileList(newName, oldName) {
      if (newName.length == this.limit) this.showUpload = true;
      else this.showUpload = false;
    },
  },
  methods: {
    //文件列表移除文件时的函数
    handleRemove(file, fileList) {
      const index = this.fileList.findIndex((item) => item === file.uid);
      this.imgUrl.splice(index, 1);
      this.$emit("delUrl", this.imgUrl);
      if (fileList.length < this.limit) this.showUpload = false;
    },
    //点击文件列表中已上传的文件时的函数
    handlePictureCardPreview(file) {
      this.imgUrl.url = file.url;
      this.dialogVisible = true;
    },
    //这里是不需要直接上传而是通过按钮上传的方法
    submitUpload() {
      this.$refs.upload.submit();
    },
    //文件状态改变时的函数(主要逻辑函数)
    uploadFile(e, fileList) {
      //判断用户上传最大数量限制,来让上传按钮消失
      if (fileList.length >= this.limit) this.showUpload = true;
      // const file = e.file; <- 这里是不需要直接上传而是通过按钮上传的
      const file = e.raw; // <- 这里是直接上传的
      //大小
      const size = file.size / 1024 / 1024 / 2;
      if (
        !(
          file.type === "image/png" ||
          file.type === "image/gif" ||
          file.type === "image/jpg" ||
          file.type === "image/jpeg"
        )
      ) {
        this.$notify.warning({
          title: "警告",
          message:
            "请上传格式为image/png, image/gif, image/jpg, image/jpeg的图片",
        });
      } else if (size > 2) {
        this.$notify.warning({
          title: "警告",
          message: "图片大小必须小于2M",
        });
      } else {
        if (this.limit == 1) this.imgUrl = []; //此处判断为一张的时候需要清空数组
        const params = new FormData();
        params.append("source", file);
        uploadImg(params).then((res) => {
        //这里返回的数据结构(根据自己返回结构进行修改)
          if (res.data.status === 1) {
            this.$message.success("上传成功");
            this.imgUrl = res.data;
            //调用父组件的方法来传递图片参数
            this.$emit("getUrl", this.imgUrl);
          } else this.$message.error("上传失败");
        });
      }
    },
    //文件超出个数限制时的函数
    handleExceed(files, fileList) {
      this.$message.info(`最多只允许上传${this.limit}张图片`);
    },
  },
};
</script>

//这里修改上传前后的样式(我觉得el-upload不好看 也可以自行修改)
<style  scope>
.hide .el-upload--picture-card {
  display: 高防cdnhttp://www.558idc.com/gfcdn.htmlnone !important;
}
.avatar-uploader > .el-upload {
  width: 200px;
  height: 200px;
  line-height: 200px;
  border-radius: 0px;
  background: #fff;
  border: 1px dashed #ccc;
}
.avatar-uploader > .el-upload > i {
  font-size: 28px;
  color: #ccc;
}
.avatar-uploader > .el-upload-list {
  display: block;
}
.avatar-uploader > .el-upload-list > .el-upload-list__item {
  width: 200px;
  height: 200px;
  display: block;
}
.avatar-uploader > .el-upload-list > .el-upload-list__item > img {
  width: 200px;
  height: 200px;
  border-radius: 0px;
}
</style>
在页面中使用 - (因为我这边用的地方比较多,我就写全局了,你们可以根据自身项目来决定)
main.js
//图片上传组件
import UploadImg from "@/views/common/UploadImg.vue";
Vue.component('UploadImg', UploadImg)
demo.vue
<el-form-item label="上传图片">
 //limit 最大上传几张图片  //fileList 图片数组   //getUrl 获取上传后地址 //delUrl 删除上传后地址  // disabled 禁用处理
  <UploadImg :limit="1" :file-list="fileList" @getUrl="getUrl($event,'自己需要携带的参数')" @delUrl="delUrl($event,'自己需要携带的参数')" :disabled="true" />
</el-form-item>

//变量声明
data:{
 fileList:[]
 }
//函数
getUrl(getUrl){
 console.log(getUrl)
 };
delUrl(getUrl){
console.log(getUrl)
};
希望此文章能帮助到你!!
以上就是本文的全部内容,希望对大家的学习有所帮助,也希望大家多多支持hwidc。
