微信小程序后端Java接口开发的详细步骤
目录
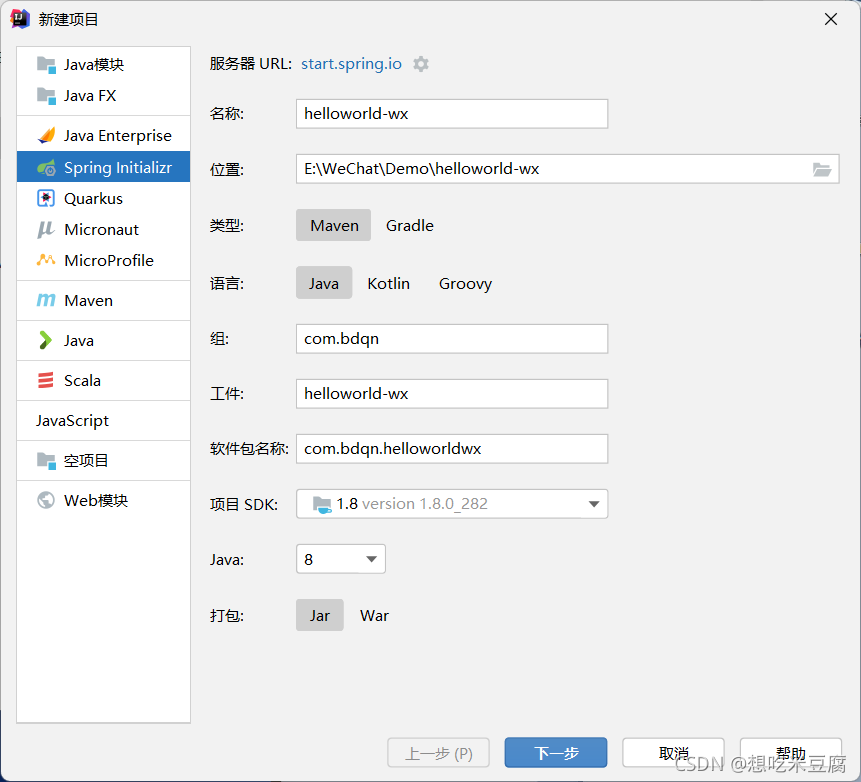
- 1、搭建一个springboot项目并引入依赖
- 2、编写controller层
- 3、创建微信小程序项目
微信小程序使用wx.request(OBJECT)来调用后端接口。
首先 我们来一个简单案例 —— helloworld实现
1、搭建一个springboot项目并引入依赖
<dependency>
            <groupId>org.springframework.boot</groupId>
            <artifactId>spring-boot-starter-web</artifactId>
        </dependency>
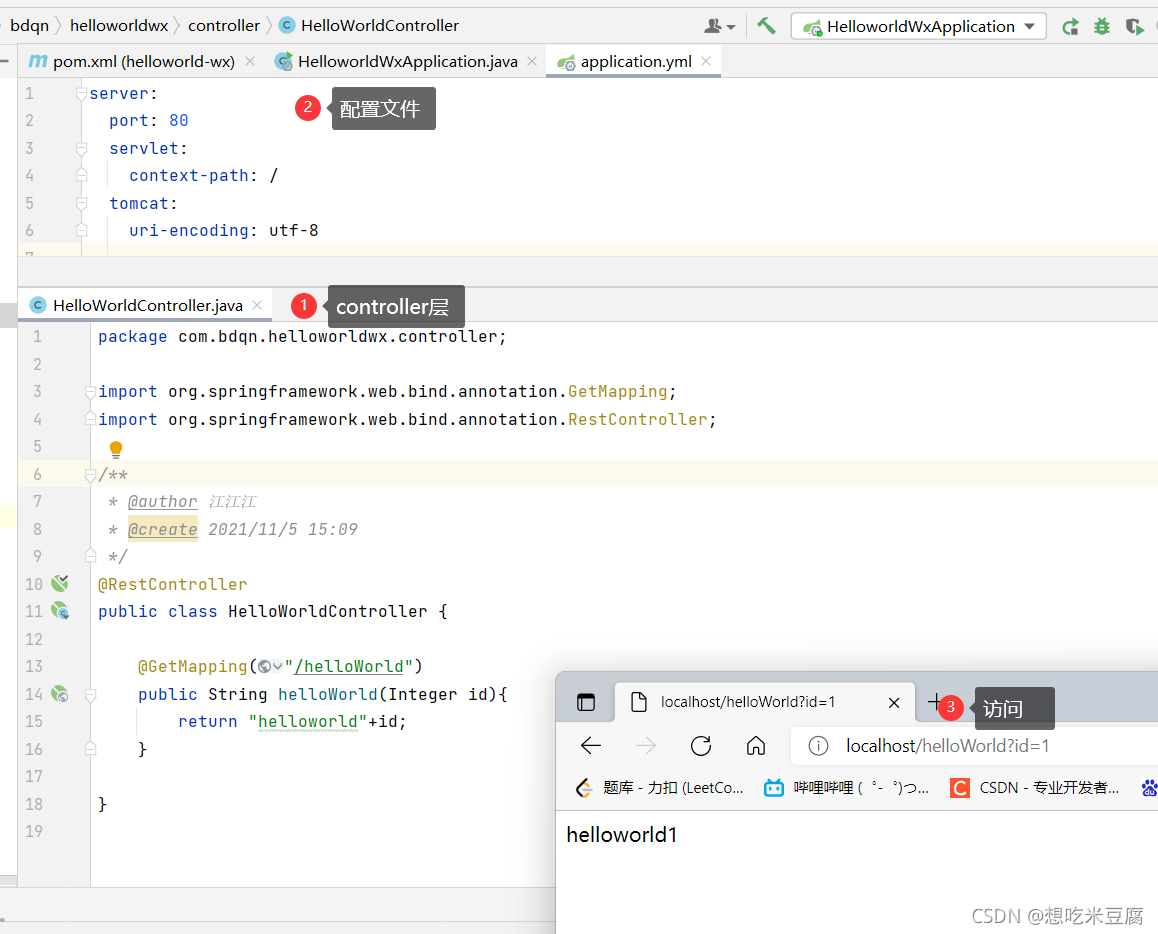
2、编写controller层
@RestController
public class HelloWorldController {
    @GetMapping("/helloWorld")
    public String helloWorld(Integer id){
        return "helloworld"+id;
    }
}
server:
  port: 80
  servlet:
    context-path: /
  tomcat:
    uri-encoding: utf-8
运行成功
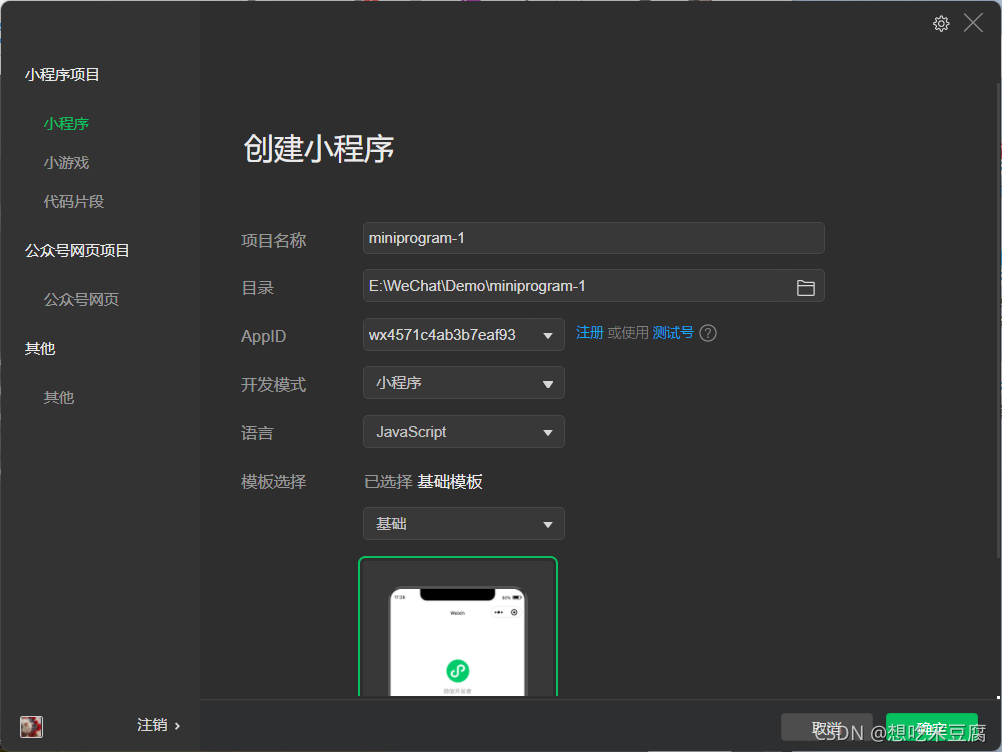
3、创建微信小程序项目
helloworld.js
 /**
     * 页面的初始数据
     */
    data: {
        result:'请求后台中.....'
    },

    /**
     * 生命周期函数--监听页面加载
     */
    onLoad: function (options) {
        var that=this;
        this.getData(that);
    },
    getData(that){
        wx.request({
          url: 'http://localhost:8080/helloWorld',
          method:'GET',
          data:{
              id:666
          },
          header:{
              'content-type':'application/json'  //默认值
          },
          success(res){
              console.log(res.data);
              console.log(that);
              that.setData({
                result:res.data
              })
          }
        })
    },
helloworld.wxml
<text>后端返回的数据:{{result}}</text>
注意:!!!!
这里记得设置 如下图
否则会报错:
VM9 asdebug.js:1 http://localhost 不在以下 request
合法域名列表中,请参考文档:https://developers.weixin.qq.com/miniprogram/dev/framework/ability/network.html(env:
Windows,mp,1.05.2110110; lib: 2.19.4)
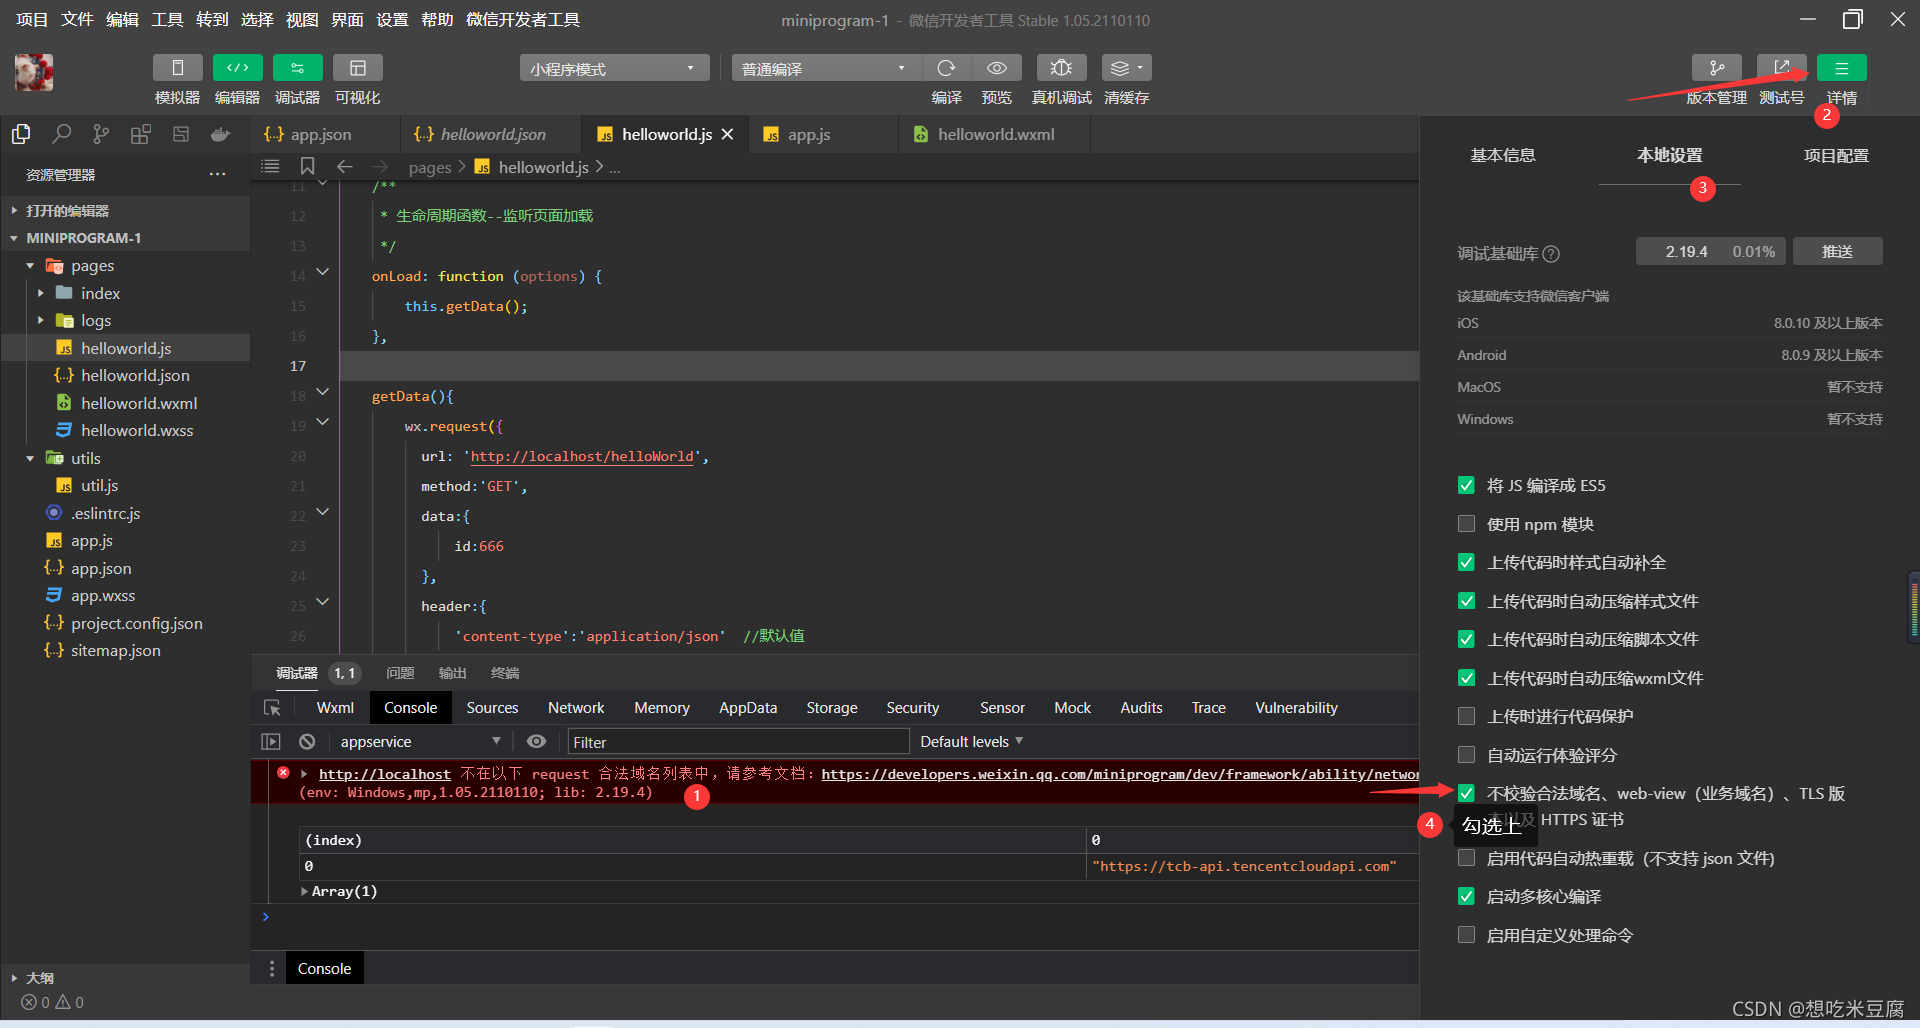
访问后端成功 如下图
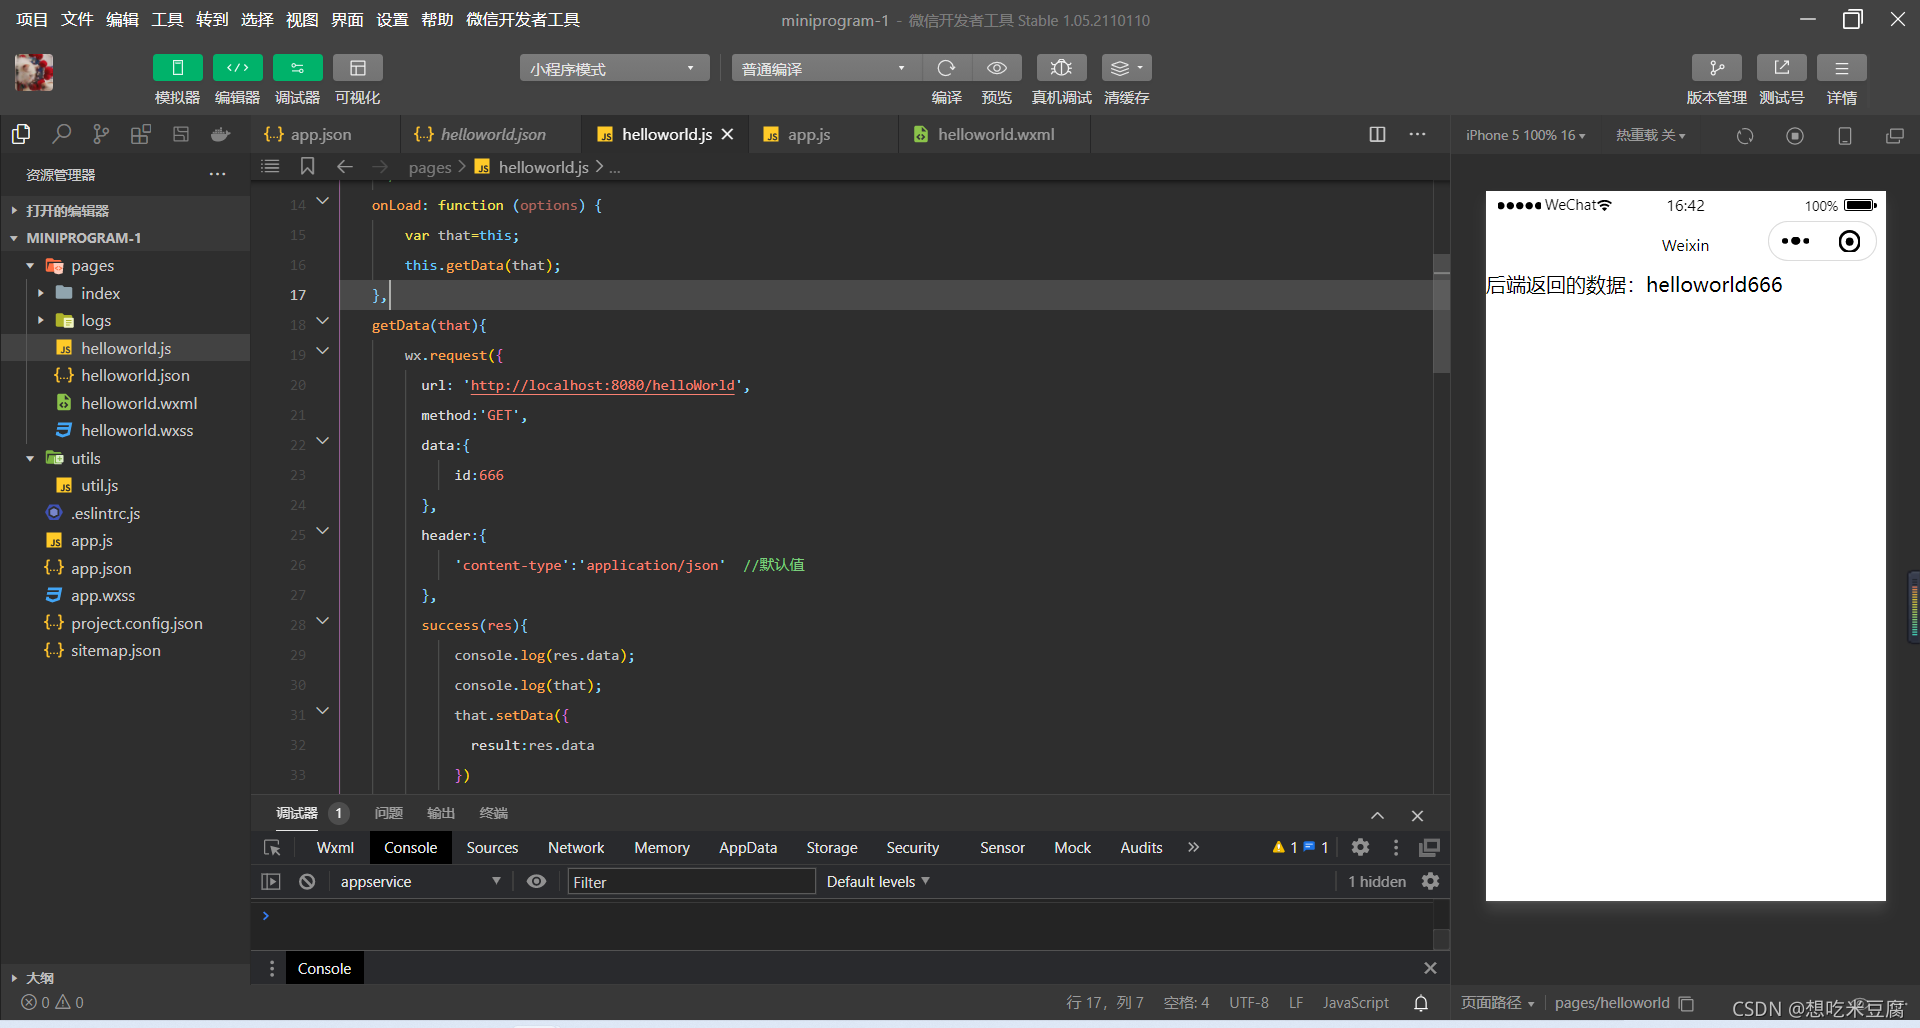
到此这篇关于微信小程序后端Java接口开发的详细步骤的文章就介绍到这了,更多相关小程序后端Java接口开发内容请搜索自由互联以前的文章或继续浏览下面的相关文章希望大家以后多多支持自由互联!
【原URL http://www.yidunidc.com/tw.html复制请保留原URL】