IOS中MMDrawerController第三方抽屉效果的基本使用示
因为刚开年,所以最近公司比较闲,看到以前并不是我接手的项目中有这种抽屉效果的控制器,比较感兴趣,便对MMDrawerController研究起来。也方便自己忘记之后查阅,另外也希望对大家有所帮助(PS:以前都是上面一个导航栏,下面一个tabbar的项目居多,所以对这种抽屉控制器不是很了解).

1.首先,到GitHub上把MMDrawerController下下来,然后倒入到项目中。当然你用cocoapods倒入也行。看你心情呗O(∩_∩)O

2.接下来就在appdelegate中撸我们的代码了。先倒入各个控制器哈。
#import"MMDrawerController.h"
#import"rightViewController.h"
#import"centerViewController.h"
#import"leftViewController.h"
#import"MainNavViewController.h"
然后就是在didFinishLaunching中设置相关的控制了,其实跟平时项目的区别就是多了一个抽屉控制器。
- (BOOL)application:(UIApplication*)application didFinishLaunchingWithOptions:(NSDictionary*)launchOptions {
self.window= [[UIWindowalloc]initWithFrame:[UIScreenmainScreen].bounds];
//左中右三个控制器
rightViewController*rightVc = [[rightViewControlleralloc]init];
leftViewController*leftVc = [[leftViewControlleralloc]init];
centerViewController*centerVc = [[centerViewControlleralloc]init];
//导航控制器
MainNavViewController*rightNavVc = [[MainNavViewControlleralloc]initWithRootViewController:rightVc];
MainNavViewController*leftNavVc = [[MainNavViewControlleralloc]initWithRootViewController:leftVc];
MainNavViewController*centerNavVc = [[MainNavViewControlleralloc]initWithRootViewController:centerVc];
//抽屉控制器
self.mmDrawerController= [[MMDrawerControlleralloc]initWithCenterViewController:centerNavVcleftDrawerViewController:leftNavVcrightDrawerViewController:rightNavVc];
//  关闭模式手势
self.mmDrawerController.closeDrawerGestureModeMask = MMCloseDrawerGestureModeAll;
//  打开模式手势
self.mmDrawerController.openDrawerGestureModeMask = MMOpenDrawerGestureModeAll;
//  抽屉控制器的最长宽度
self.mmDrawerController.maximumLeftDrawerWidth = 200;
[self.windowmakeKeyAndVisible];
self.window.rootViewController=self.mmDrawerController;
returnYES;
}
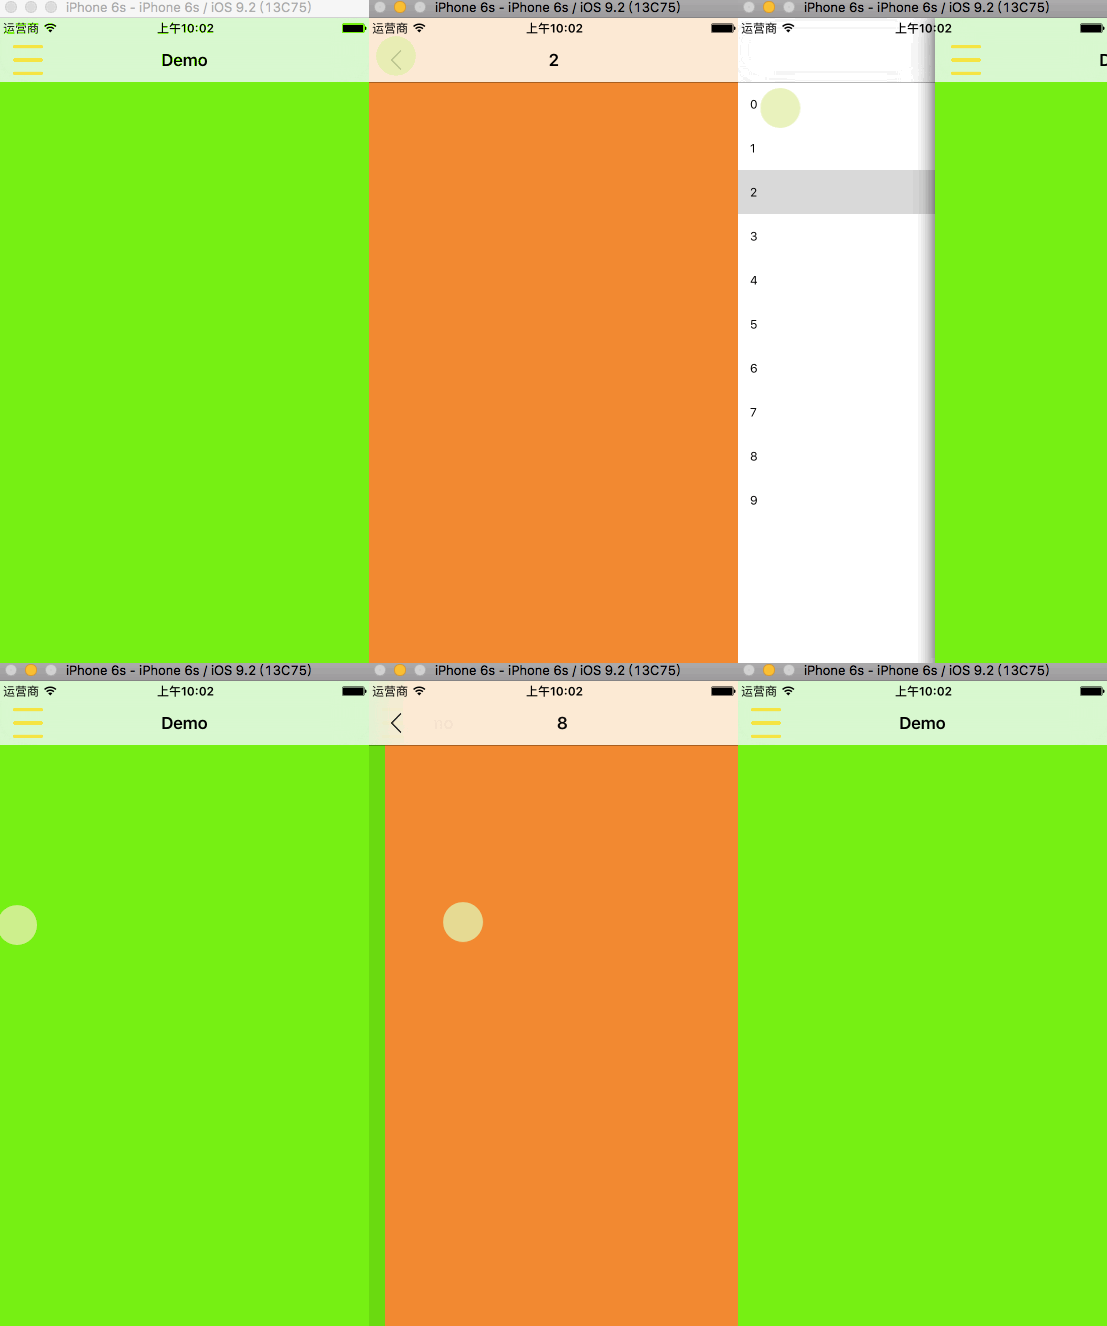
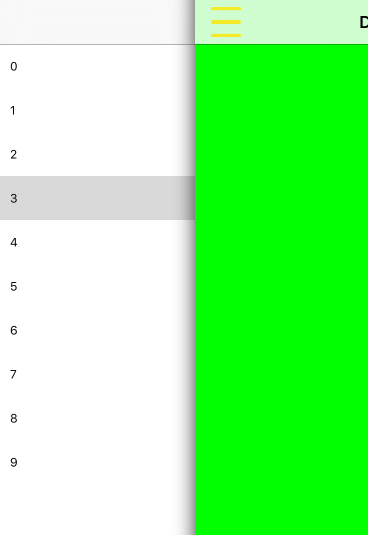
其实在这里就已经可以实现抽屉控制器的基本效果的了。但是要如下图的效果还得加一丢丢代码。

然后我们在center控制器导航栏的leftBarButton上自定义一个button,添加点击事件等等,这应该不难哈。记得要导入相关的类。
#import "UIViewController+MMDrawerController.h"
- (void)viewDidLoad {
  [super viewDidLoad];
  // Do any additional setup after loading the view.
  self.title = @"Demo";
  self.view.backgroundColor = [UIColor greenColor];
  //UIBarButtonItem的自定义的分类方法
  self.navigationItem.leftBarButtonItem = [UIBarButtonItem initWithTarget:self action:@selector(leftBtnClick) image:@"菜单 (1)" hightImage:@"菜单"];
}

-(void)leftBtnClick{
//  将左边的控制器打开
  [self.mm_drawerController toggleDrawerSide:MMDrawerSideLeft animated:YES completion:nil];
}
下面就是left控制器的代码哈,就是在view上添加了一个tableView。
#import "leftViewController.h"
#import "pushViewController.h"
#import "UIViewController+MMDrawerController.h"
#import "MainNavViewController.h"

@interface leftViewController ()<UITableViewDelegate,UITableViewDataSource>

@end

@implementation leftViewController

- (void)viewDidLoad {
  [super viewDidLoad];
  // Do any additional setup after loading the view.
    self.view.backgroundColor = [UIColor blueColor];

  UITableView *tableView = [[UITableView alloc] initWithFrame:CGRectMake(0, 0, [UIScreen mainScreen].bounds.size.width, [UIScreen mainScreen].bounds.size.height)];
  tableView.delegate = self;
  tableView.dataSource = self;
  [self.view addSubview:tableView];
}

-(NSInteger)tableView:(UITableView *)tableView numberOfRowsInSection:(NSInteger)section{
  return 10;
}

-(UITableViewCell *)tableView:(UITableView *)tableView cellForRowAtIndexPath:(NSIndexPath *)indexPath{
  UITableViewCell *cell = [tableView dequeueReusableCellWithIdentifier:@"cell"];

  if (cell == nil) {
    cell = [[UITableViewCell alloc] initWithStyle:UITableViewCellStyleSubtitle reuseIdentifier:@"cell"];
  }

  cell.detailTextLabel.text = [NSString stringWithFormat:@"%zd",indexPath.row];

  return cell;
}
点击cell跳转控制器
-(void)tableView:(UITableView *)tableView didSelectRowAtIndexPath:(NSIndexPath *)indexPath{
  pushViewController *pushVc = [[pushViewController alloc] init];
  pushVc.title = [NSString stringWithFormat:@"%zd",indexPath.row];
  //取到center控制器
  MainNavViewController *mainNavVc = (MainNavViewController *)self.mm_drawerController.centerViewController;
  [mainNavVc pushViewController:pushVc animated:YES];
  //关闭了控制器之后记得将模式设置为None
  [self.mm_drawerController closeDrawerAnimated:YES completion:^(BOOL finished) {
    [self.mm_drawerController setOpenDrawerGestureModeMask:MMOpenDrawerGestureModeNone];
  }];

}
最后记得在center控制器的viewDidAppear中打开滑动的手势
-(void)viewDidAppear:(BOOL)animated{
  [super viewDidAppear:animated];

  [self.mm_drawerController setOpenDrawerGestureModeMask:MMOpenDrawerGestureModeAll];
}
以上就是本文的全部内容,希望对大家的学习有所帮助,也希望大家多多支持海外IDC网。
【文章转自韩国多ip站群服务器 http://www.558idc.com/krzq.html处的文章,转载请说明出处】