详细分析PHP中怎样定义颜色、绘制点、线和矩形
在之前的文章中给大家带来了《PHP中怎么输出图片?(图例详解)》,其中详细介绍了应该怎样在PHP中输出图片,本篇文章继续给大家带来我们应该怎样在PHP中绘制图像,希望能够帮助到大家!

在PHP中绘制图像一切还是基于上一篇文章中的画布,创建画布,然后在画布上进行绘制图像。想到图像我们就想到了色彩,所以首先,我们来看一下,我们应该怎样在PHP中给图像定义颜色。
图像定义颜色
在我们使用PHP进行图像操作时,必然离不开的就是颜色的设置,不同的颜色勾勒出了这漂亮的图像。那么在PHP中我们应该怎样给图像来提供颜色呢?这时候我们就要用到imagecolorallocate() 和 imagecolorallocatealpha()这两个函数。接下来,我们就来看一看应该怎样使用这两个函数。
imagecolorallocate()函数
imagecolorallocate() 函数能够为图像分配颜色,想要设置多种颜色的话,需要多次调用该函数,函数的语法格式:
imagecolorallocate(resource $image, int $red, int $green, int $blue)登录后复制
其中,$image表示了需要设置颜色的图像,该函数会返回一个标识符,表示了给定的RGB成分组成的颜色,$red,$green 和 $blue 分别是所需要的颜色的红,绿,蓝成分,取值范围是 0 到 255 的整数或者十六进制的 0x00 到 0xFF。
示例如下:
<?php
    $image = imagecreate(100, 100);
    $blue = imagecolorallocate($image, 0, 0, 255);
    header('Content-type:image/jpeg');
    imagejpeg($image);
    imagedestroy($image);
?>登录后复制输出结果:

imagecolorallocatealpha()函数
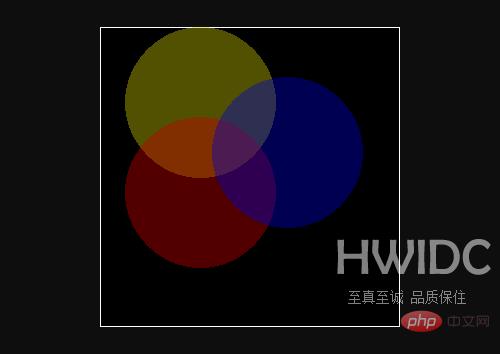
imagecolorallocatealpha()函数与imagecolorallocate()函数相比,它们的作用是相同的,但是多了一个用来设置透明参数的alpha,它的语法格式如下:
imagecolorallocatealpha(resource $image, int $red, int $green, int $blue, int $alpha)登录后复制
其中,前面的参数与imagecolorallocate()函数的参数表示为一致的,$alphab表示的是透明度的参数,取值范围在 0 到 127 之间,0 表示完全不透明,127 则表示完全透明。
示例如下:
<?php
    $size=300;
    $image=imagecreatetruecolor($size,$size);
    $back=imagecolorallocate($image,0,0,0);
    $border=imagecolorallocate($image,255,255,255);
    imagefilledrectangle($image,0,0,$size-1,$size-1,$back);
    imagerectangle($image,0,0,$size-1,$size-1,$border);
    $yellow_x=100;
    $yellow_y=75;
    $red_x=100;
    $red_y=165;
    $blue_x=187;
    $blue_y=125;
    $radius=150;
    //用alpha值分配一些颜色
    $yellow=imagecolorallocatealpha($image,200,200,0,75);
    $red=imagecolorallocatealpha($image,200,0,0,75);
    $blue=imagecolorallocatealpha($image,0,0,200,75);
    //画3个交迭的圆
    imagefilledellipse($image,$yellow_x,$yellow_y,$radius,$radius,$yellow);
    imagefilledellipse($image,$red_x,$red_y,$radius,$radius,$red);
    imagefilledellipse($image,$blue_x,$blue_y,$radius,$radius,$blue);
    //不要忘记输出正确的header!
    header('Content-type:image/png');
    //最后输出结果
    imagepng($image);
    imagedestroy($image);
?>登录后复制输出结果:

由此通过imagecolorallocate() 和 imagecolorallocatealpha()这两个函数已经能够实现在图像上定义颜色了。同时图像不仅是由颜色构成的,还需要有点、线还有不同的形状。那接下来我们来看一看,应该怎样去解决这些问题。
绘制点和线
绘制点和线可以说是PHP中绘制图像最基本的操作了,虽然很基本,但是灵活应用起来,可以通过它们绘制出更多复杂的图像,我们可以通过 imagesetpixel() 函数在画布中绘制一个点,也可以设置点的颜色,它的函数的语法格式如下:
imagesetpixel(resource $image, int $x, int $y, int $color)登录后复制
其中,$image表示的是创建的画布,$x和$y表示的是在($x,$y)这个坐标点,这个坐标点的颜色是$color。
绘制一条线段则可以使用 imageline() 函数,其语法格式如下:
imageline(resource $image, int $x1, int $y1, int $x2, int $y2, int $color)登录后复制
其中,表示在坐标($x1,$y1)到坐标($x2,$y2)的一条颜色为$color的线段。
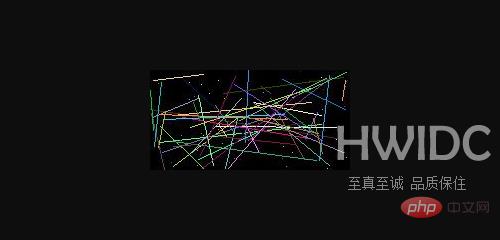
接下来我们可以通过循环和随机数的结合来进行示例:
<?php
    $img = imagecreate(200, 100);
    imagecolorallocate($img, 0, 0, 0);
    $blue = imagecolorallocate($img, 0, 0, 255);
    $red = imagecolorallocate($img, 255, 0, 0);
    for ($i=0; $i <= 50; $i++) {
        $color = imagecolorallocate($img, rand(0, 255), rand(0, 255), rand(0, 255));
        imagesetpixel($img, rand(0, 200), rand(0, 100), $color);
        imageline($img, rand(0, 200), rand(0, 100), rand(0, 200), rand(0, 100), $color);
    }
    header('Content-type:image/jpeg');
    imagejpeg($img);
    imagedestroy($img);
?>登录后复制输出结果:

绘制矩形
在PHP中,我们想要绘制矩形的话,需要通过 imagerectangle() 或者 imagefilledrectangle() 函数来进行。imagefilledrectangle() 函数会在绘制完成矩形后填充矩形,但是imagerectangle() 函数不会。它们的语法格式如下:
imagerectangle(resource $image, int $x1, int $y1, int $x2, int $y2, int $color)
imagefilledrectangle(resource $image, int $x1, int $y1, int $x2, int $y2, int $color)
登录后复制
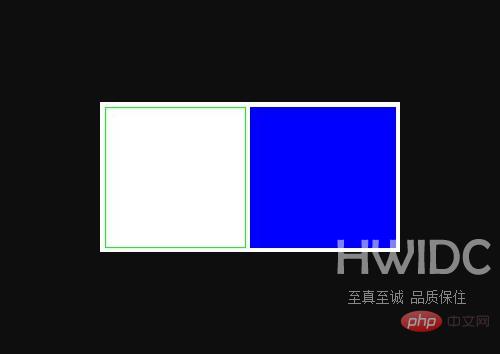
其中,两者表示的都是绘制一个左上角坐标为($x1,$y1),右下角坐标为($x2,$y2)的矩形,两者不一样的是:imagerectangle()函数后的颜色代表的是矩形边线的颜色,imagefilledrectangle()函数后的颜色表示的是矩形内的填充颜色。
接下来通过示例通过 imagerectangle() 或者 imagefilledrectangle() 函数分别绘制一个矩形,示例如下:
<?php
    $img = imagecreate(300, 150);
    imagecolorallocate($img, 255, 255, 255);
    $green = imagecolorallocate($img, 0, 255, 0);
    $blue = imagecolorallocate($img, 0, 0, 255);
    imagerectangle($img, 5, 5, 145, 145, $green);
    imagefilledrectangle($img, 150, 5, 295, 145, $blue);
    header('Content-type:image/jpeg');
    imagejpeg($img);
    imagedestroy($img);
?>登录后复制输出结果:

推荐学习:《PHP视频教程》
以上就是详细分析PHP中怎样定义颜色、绘制点、线和矩形?的详细内容,更多请关注海外IDC网其它相关文章!
【文章出处:香港站群服务器 http://www.558idc.com/hkzq.html 复制请保留原URL】