浅析angular中怎么使用monaco-editor
angular中怎么使用monaco-editor?下面本篇文章记录下最近的一次业务中用到的 monaco-editor 在 angular 中的使用,希望对大家有所帮助!

安装依赖
在 angular12 及之前你可以选择
- monaco-editor
- ngx-monaco-editor
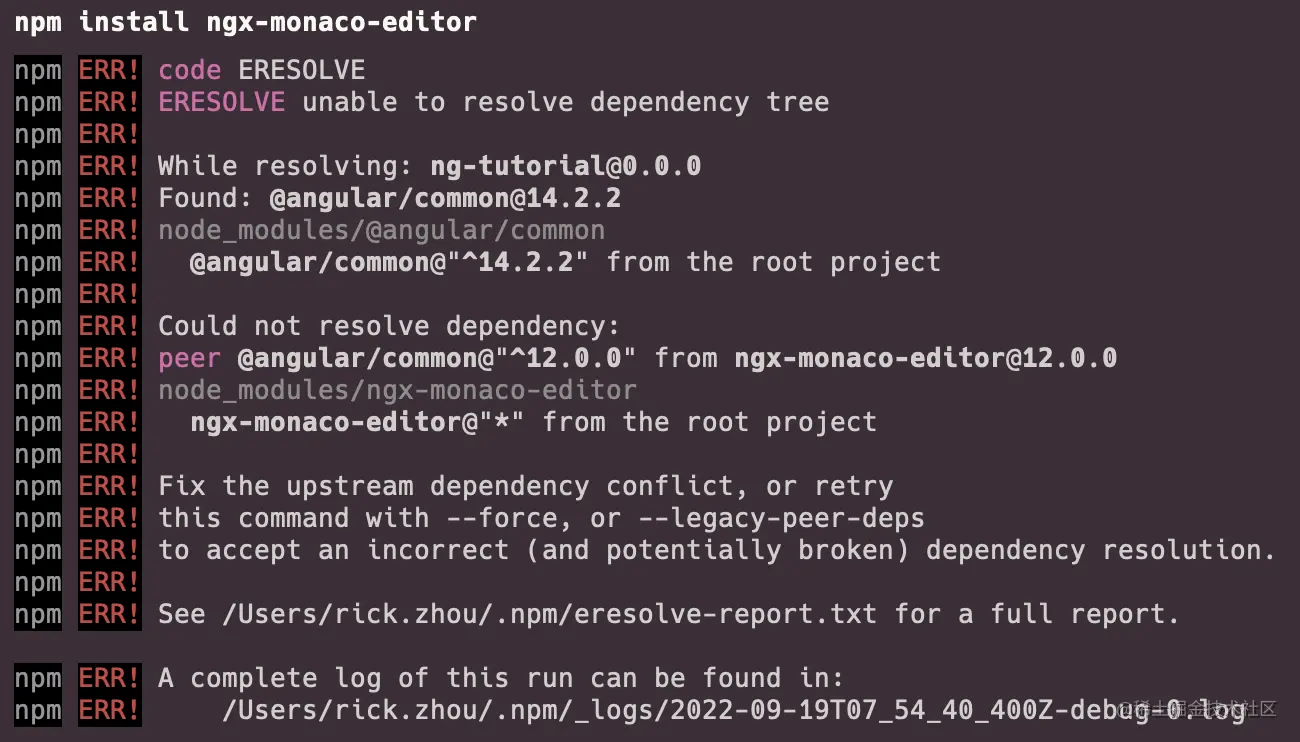
这是没有问题的 但是如果你使用了更高版本的 angular 在使用 npm 安装 ngx-monaco-editor 时 会报错。【相关教程推荐:《angularjs视频教程》】
因为原作者似乎已经停止了对这个库的维护 最终的支持停留在了 angular12 版本

当然 你选择可以选择正如提示那样 用 --force 或者 --legacy-peer-deps 来解决问题
但是为了 消除/避免 隐藏的一些问题 我在原作者的基础上将框架的 angular 支持提升到了 14 并且会一直更新
@rickzhou/ngx-monaco-editor
github github.com/rick-chou/n…
npm www.npmjs.com/package/@ri…
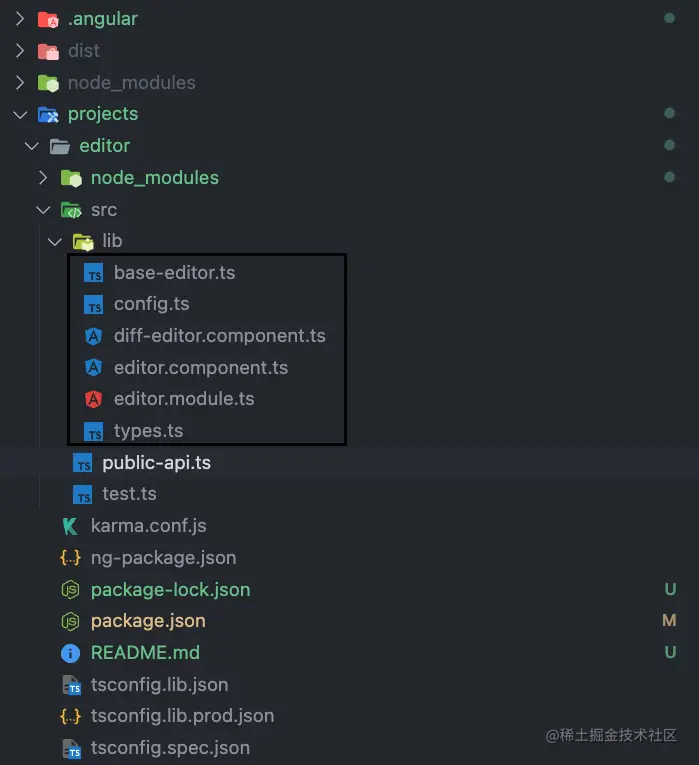
当然 你也可以选择将作者的源代码移入自己的本地代码中 这也是完全没有问题的
- base-editor.ts 引入 monaco-editor
- config.ts
- diff-editor.component.ts
- editor.component.ts
- editor.module.ts
- types.ts

github.com/rick-chou/n…
你只需要移动 lib 目录下的六个文件 然后把它们当成自己项目中的一个 module 去使用就好了
使用
其实所有的 api 都可以在 editor.api.d.ts 这个文件中找到
// 在这个editor下就可以找到所有TS类型
import { editor } from 'monaco-editor';登录后复制下面记录一下常用的
1、设置
// eg
export const READ_EDITOR_OPTIONS: editor.IEditorOptions = {
  readOnly: true,
  automaticLayout: false,
  minimap: {
    enabled: false,
  },
  renderFinalNewline: false,
  scrollbar: {
    vertical: 'visible',
  },
  mouseWheelZoom: true,
  contextmenu: false,
  fontSize: 16,
  scrollBeyondLastLine: false,
  smoothScrolling: true,
  cursorWidth: 0,
  renderValidationDecorations: 'off',
  colorDecorators: false,
  hideCursorInOverviewRuler: true,
  overviewRulerLanes: 0,
  overviewRulerBorder: false,
};登录后复制2、获取editor实例
<ngx-monaco-editor
  [options]="readEditorOptions"
  [(ngModel)]="originLogVal"
  (onInit)="initViewEditor($event, false)">
</ngx-monaco-editor>

public initViewEditor(editor: editor.ICodeEditor): void {
  // 这个editor就是实例
  // 下面方法中的editor就是这里的editor
  this.editor = editor
}登录后复制3、获取当前光标位置
editor.getPosition()登录后复制
4、获取当前鼠标选中的文本
editor.getModel().getValueInRange(editor.getSelection());登录后复制
5、修改光标位置
editor.setPosition({
      column: 1,
      lineNumber: 1,
});登录后复制6、滚动指定行到可视区中间
editor.revealLineInCenter(1);登录后复制
7、绑定事件
editor.onMouseDown(event => {
  // do something
});
editor.onKeyDown(event => {
  // do something
});登录后复制8、保存/恢复快照
const snapshot = editor.saveViewState();
editor.restoreViewState(snapshot);
登录后复制
9、阻止某个事件
// eg 组件默认的搜索快捷键
function isMac() {
  return /macintosh|mac os x/i.test(navigator.userAgent);
}

editor.onKeyDown(event => {
  if (
    (isMac() && event.browserEvent.key === 'f' && event.metaKey) ||
    (!isMac() && event.browserEvent.key === 'f' && event.ctrlKey)
  ) {
    event.preventDefault();
    event.stopPropagation();
  }
});登录后复制更多编程相关知识,请访问:编程视频!!
