轮播图实战(模块实现)
一、HTML文件
模块导入
<div class="slideshow"><!--1. 图片容器--><div class="imgs"></div><!--2. 按钮容器--><div class="btns"></div><!--所有图片,以及对应的按钮,动态创建--></div>
二、CSS文件
<!--模块--><script type="module">/*import { imgArr } from './js/slideshow.js'console.log(imgArr)*/const imgs = document.querySelector('.imgs')const btns = document.querySelector('.btns')/*** 轮播图至少需要4个函数* 1. 创建图片组:createImgs()* 2. 创建按钮组:createBtns()* 3. 创建按钮事件:switchImg()* 4. 定时轮播(定时器):timePlay()*/// 匿名导入// import {createImgs, createBtns, switchImg, timePlay} from './js/slideshow.js'import * as slide from './js/slideshow.js'// slide.timePlay()window.onload = function() {// 1. 创建图片组slide.createImgs(imgs)// 2. 创建按钮组slide.createBtns(imgs, btns)// 3. 创建按钮事件// 要逐个添加,不能用事件冒泡来简化;[...btns.children].forEach(function(btn) {btn.onclick = function() {slide.switchImg(btn, imgs)}})// 4. 定时轮播(定时器)// 首尾相连,才能实现循环往复的效果// 间歇式的定时器// 其实定时器的参数,从第三个参数起,之后全部参数自动传递给第一个参数回调中setInterval (function(btnArr, btnKeys) {console.log(btnArr, btnKeys)slide.timePlay(btnArr, btnKeys)},2000,[...btns.children],Object.keys([...btns.children]))}</script>
三、JS文件3.1、data.js
body {background-color: #eee;}/* 轮播图容器 */.slideshow {width: 240px;height: 360px;/* em / rem */}/* 图片容器 */.slideshow .imgs {width: inherit;height: inherit;/* width: 100%;height: 100%; */}/* 图片适应 */.slideshow img {width: 100%;height: 100%;border-radius: 10px;/* ? 默认全隐藏 */display: none;}/* 设置图片的激活状态 */.slideshow img.active {display: block;opacity: 1;}.slideshow img:hover {cursor: pointer;}/* ------ 按钮容器 ------- *//* 按钮容器 */.slideshow .btns {display: flex;place-content: center;position: relative;top: -40px;/* transform: translateY(-40px); */}.slideshow .btns > span {background-color: rgba(233, 233, 233, 0.8);height: 16px;width: 16px;border-radius: 50%;margin: 5px;}.slideshow .btns > span.active {background-color: orangered;}.slideshow .btns > span:hover {cursor: pointer;}
3.2、slideshow.js
export default [{key: 1,src: './images/item1.jpeg',url: 'https://www.php.cn'},{key: 2,src: './images/item2.jpeg',url: 'https://www.php.cn'},{key: 3,src: './images/item3.jpeg',url: 'https://www.php.cn'},]
重点:
// 轮播图处理模块// 导入数据// import imgArr from './data.js' //匿名导出// import {arr} from './data.js'import imgArr from './data.js' //匿名导出// imgArr 只在当前模块中使用,不用导出到HTML页面// export {imgArr}/*** 轮播图至少需要4个函数* 1. 创建图片组:createImgs()* 2. 创建按钮组:createBtns()* 3. 创建按钮事件:switchImg()* 4. 定时轮播(定时器):timePlay()*/// ? 1. 创建图片组:createImgs()// imgs: 图片容器function createImgs(imgs) {// console.log('图片创建成功');// 生成一个文档片段const frag = new DocumentFragment()for (let i = 0; i < imgArr.length; i++) {// 1. 创建图片const img = document.createElement('img')// 2. 为图片添加属性// data-keyimg.dataset.key = imgArr[i].keyimg.src = imgArr[i].src// 默认显示第一张if (i === 0) img.classList.add('active')// 3. 为图片添加事件,点击之后跳转到哪里?img.onclick = function () {location.href = imgArr[i].url}// 4. 添加到片段上frag.append(img)}// 5. 将片段添加到图片容器中imgs.append(frag)}// ===============================================================// ? 2. 创建按钮组:createBtns()// btns: 按钮容器function createBtns(imgs, btns) {// 1. 获取到图片的数量let length = imgs.childElementCount// 2. 根据图片数量来生成对应的按钮for (let i = 0; i < length; i++) {// 创建按钮const btn = document.createElement('span')// 添加索引 data-key,必须与图片对应btn.dataset.key = imgs.children[i].dataset.key// 第一个默认高亮显示if (i === 0) btn.classList.add('active')// 添加到容器中btns.append(btn)}}// ===============================================================// ? 3. 创建按钮事件:switchImg()// btns: 按钮容器// imgs: 图片容器function switchImg(btn, imgs) {// 1. 去掉按钮和图片的激活状态;[...imgs.children].forEach(img => img.classList.remove('active'));[...btn.parentNode.children].forEach(btn => btn.classList.remove('active'))// 2. 将当前的正在被用户点击的按钮激活btn.classList.add('active')// 3. 根据当前按钮的索引,找到对应的图片// btn.data-key === img.data-keyconst currImg = [...imgs.children].find(img => img.dataset.key === btn.dataset.key)// 4. 将与当前按钮对应的图片显示出来currImg.classList.add('active')}// ===============================================================// ? 4. 定时轮播(定时器):timePlay()// btnArr: 按钮数组// btnKeys: 按钮健数组function timePlay(btnArr, btnKeys) {// 定时器 + 事件派发// setInterval() + dispatchEvent()// 1. 从头部取一个let key = btnKeys.shift()// 2. 根据索引找到对应的按钮,再给它自动派发一个点击事件btnArr[key].dispatchEvent(new Event('click'))// 3. 将刚才取出的按钮,再放到尾部重新进入数组中,实现首尾相连btnKeys.push(key)}// ===============================================================// 导出这4个函数export {createImgs, createBtns, switchImg, timePlay}
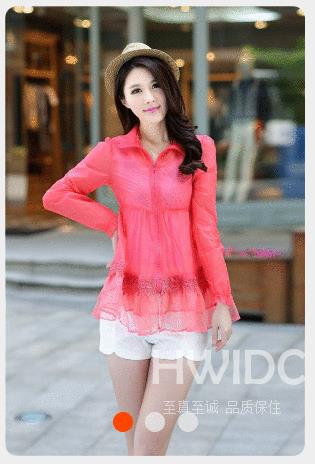
效果图:
一、模块用到4个函数(JS模块):// ? 1. 创建图片组:createImgs()// ? 2. 创建按钮组:createBtns()// ? 3. 创建按钮事件:switchImg()// ? 4. 定时轮播(定时器):timePlay()二、一个图片数组(JS模块)三、HTML2个容器:// 1、图片组// 2、按钮组四、模块也是比较方便,代码简洁,容易理解,但是自己从零开始写就比较困难,需要多写多练。

